
Hours of Operations
Monday
Tuesday
Wednesday
Thursday
Friday
Saturday
Sunday
8:00AM - 5:00PM
8:00AM - 5:00PM
8:00AM - 5:00PM
8:00AM - 5:00PM
8:00AM - 4:00PM
Closed
Closed
Phone: 604.351.8142
Email: office@westcoastturnkey.com
#101 - 6697 Nelson Ave, West Vancouver
BC V7W-2B2
Follow us on Instagram

published by: WEST COAST TURN KEY
published by: WEST COAST TURN KEY
Steps to building a custom home
published by: WEST COAST TURN KEY
Learn the process -
Learn what to expect at every stage of your home-building journey, from initial planning and design to construction and final handover. Our guide helps homeowners understand the process, make informed decisions, and build with confidence.
Learn the process -

Learn the process -
Steps to building a custom home
published by: WEST COAST TURN KEY
Learn what to expect at every stage of your home-building journey, from initial planning and design to construction and final handover. Our guide helps homeowners understand the process, make informed decisions, and build with confidence.
01
Communication
02
Budget
03
Design
04
Land
05
Permits
06
Site
07
Framing
08
MEP
09
Interior
10
Inspections
01
Communication and Initial Consultation
Every great home starts with a clear conversation about your goals, your budget, and how you want to live. The first meetings with your builder set the tone for the whole project, and the quality of that communication often predicts how smoothly the build will go.
This page explains what to expect from an initial consultation, what to bring, and which questions reveal whether a builder is the right fit. It also covers how communication should work during construction, including who your main contact is, how often you will get updates, and how changes are approved.
Your Guide to Building a Custom Home
1. What Happens in the First Consultation?
The first consultation is an opportunity to get to know your builder, discuss your vision, and determine whether you’re a good fit to work together. It’s where your ideas begin to take shape and the initial direction of your project is established. You’ll discuss your goals, property, timeline, and approximate budget, as well as the next steps involved in bringing your dream home to life.
Examples: Discussing the number of bedrooms you need, your preferred architectural style, whether you already own a property, and your ideal move-in date.
2. What to Prepare Before You Meet
Coming prepared helps make your first meeting more productive and ensures your builder understands what matters most to you. You don’t need every detail figured out, but having a general idea of your priorities, budget, and preferred style can help guide the conversation and establish realistic expectations from the beginning.
Examples: Creating a wish list, separating must-haves from nice-to-haves, collecting inspiration photos from Pinterest, bringing property or lot details, and identifying a comfortable budget range.
3. Questions to Ask a Home Builder
Choosing the right builder is one of the most important decisions you’ll make during your project. Asking the right questions helps you understand their experience, working style, and approach to managing your investment. A reputable builder should be transparent, willing to answer your questions, and able to explain how they manage the construction process from start to finish.
Examples: Asking to see previous projects, requesting client references, confirming licensing and insurance, understanding warranty coverage, and learning how unexpected costs, design changes, or construction delays are handled.
4. Red Flags to Watch For
Building a home is a significant financial commitment, so it’s important to recognize potential warning signs before signing an agreement. Clear communication, transparent pricing, and written documentation help protect both you and your builder. If something feels unclear or you’re being pressured into making a quick decision, take the time to ask questions and seek clarification.
Examples: Vague estimates with no cost breakdown, reluctance to provide references, pressure to sign immediately, unclear payment schedules, or an unwillingness to provide a detailed written contract.
5. How Communication Works During the Build
Good communication keeps your project organized and helps you stay informed as your home takes shape. Before construction begins, establish how often you’ll receive updates, who your main point of contact will be, and how important decisions will be documented. Having a clear communication plan reduces misunderstandings and helps address questions before they become larger issues.
Examples: Weekly progress updates, scheduled site visits, regular meetings with your project manager, shared schedules and project documents, and written confirmation of changes to the design or budget.
6. Fixed-Price vs. Cost-Plus Contracts
Understanding your construction contract helps you make informed financial decisions before work begins. A fixed-price contract generally sets an agreed price for a defined scope of work, while a cost-plus contract charges the actual project costs along with an agreed builder’s fee. Each approach has advantages, and the right choice depends on the project, the level of design detail, and how costs and changes are managed.
Examples: A fixed-price agreement may offer greater cost predictability when plans and specifications are well defined. A cost-plus agreement may provide flexibility when selections or project details are still evolving. In either case, clarify exclusions, allowances, change orders, fees, and how cost overruns are handled.
7. Next Step: Understanding Your Budget
Once you have a clear vision and understand the building process, the next step is establishing a realistic budget. Your budget should account for more than the construction itself, including design fees, permits, site preparation, utility connections, landscaping, and a contingency for unexpected expenses. Planning these costs early helps you prioritize your spending and make confident decisions throughout the project.
Examples: Establishing your overall spending limit, estimating construction costs, identifying potential site expenses, setting aside a contingency fund, and deciding where to invest in premium materials or finishes.
Ready to take the next step? Explore Step 2 of our home-building guide to learn how to plan your budget and understand the costs involved in building your custom home.
Questions to answer (FAQ)
-
How do I find a good home builder? Ask for referrals, review past projects, read reviews, and interview at least three builders.
-
What should I bring to my first builder meeting? A wish list, inspiration photos, a budget range, and any lot or survey information.
-
Should I get multiple quotes? Yes, but compare scope and inclusions, not just the final number.
-
How do I know if a builder is licensed and insured? Ask for proof and verify it with your local licensing authority.
-
What happens if I change my mind during the build? Changes are handled through a written change order that shows the cost and schedule impact.


02
Budget and Financing
Knowing what your home will really cost, including the expenses people often overlook, is the foundation of a stress-free build. A clear budget protects you from mid-project surprises and helps you and your builder make good choices about size, finishes, and features.
This page explains the main cost categories in a home build, how construction financing works, and how to set aside a contingency for the unexpected. Use real examples from your own projects wherever you can, because specific numbers are the content people trust and share most.
Your Guide to Building a Custom Home
1. What Goes Into the Cost of a New Home?
Building a custom home involves much more than the cost of construction. Your overall budget needs to account for everything from purchasing land and preparing the site to designing the home, selecting finishes, and completing the landscaping. Understanding these expenses early helps you plan realistically, prioritize what matters most, and avoid unexpected financial surprises as your project progresses.
Examples: Land purchase, architectural and engineering fees, permits, excavation, foundation work, construction labour, materials, kitchen cabinetry, flooring, landscaping, and furnishings.
2. Cost Per Square Foot, and Why It Can Be Misleading
Cost per square foot is often used to estimate the price of building a home, but it doesn't tell the whole story. Two homes with the same floor area can have significantly different costs depending on their layouts, finishes, complexity, and site conditions. Use this measurement as an initial reference rather than a guaranteed price, and ask your builder what is included in any estimate.
Examples: A home with a large, high-end kitchen, multiple bathrooms, custom cabinetry, and premium finishes may cost considerably more than a similarly sized home with simpler specifications. A steep lot requiring extensive excavation may also increase costs.
3. Hidden and Often Forgotten Costs
Some expenses are easy to overlook when planning a new home, particularly those related to the property itself and the finishing details. These costs can add up quickly if they aren't included in your initial budget. Reviewing potential expenses with your builder and relevant professionals helps you develop a more complete financial plan before construction begins.
Examples: Utility connections, driveway installation, retaining walls, land surveys, soil testing, tree removal, window coverings, appliances, landscaping, and final site cleanup. Depending on your property, additional drainage, access, or servicing requirements may also apply.
4. How to Set a Realistic Budget
A realistic budget starts with understanding how much you can comfortably invest in the entire project, not just the construction itself. From there, allocate funds to major categories such as design, permits, site preparation, construction, and finishing. It's also important to set aside a contingency fund for unexpected conditions or necessary changes, so one surprise doesn't put your entire project at risk.
Examples: Establishing your total spending limit, obtaining preliminary estimates, separating essential features from upgrades, tracking allowances and selections, and reserving approximately 10–20% as a contingency, depending on the project's complexity and how much uncertainty remains.
5. How Construction Loans Work
Construction financing differs from a traditional mortgage because the funds are often released in stages as work progresses. The lender may require inspections, progress reports, or other documentation before approving each payment. During construction, you may make interest-only payments on the funds drawn, depending on your loan terms. Once the home is complete, the financing may convert to a regular mortgage or require separate mortgage approval.
Examples: A lender releases funds after the foundation is completed, additional funds as the structure progresses, and further payments at later construction milestones. Before starting, speak with your lender about down payment requirements, interest rates, draw schedules, inspections, and how the loan transitions after completion.
Note: Construction loan terms vary by lender and financing arrangement.
6. Ways to Control Costs Without Lowering Quality
Managing your budget doesn't mean sacrificing good design or durable materials. Often, the biggest savings come from simplifying the home's structure, making thoughtful design decisions, and avoiding expensive changes once construction is underway. Working closely with your builder and design team helps you identify where to invest for long-term value and where simpler choices can achieve a similar result.
Examples: Choosing a simpler roofline, designing a more compact and efficient floor plan, aligning plumbing locations where practical, selecting standard-sized windows and doors, comparing material options, and finalizing finishes before construction begins.
7. Next Step: Design and Planning
With a clearer understanding of your budget, it's time to turn your ideas into a practical design. Your budget, lifestyle, property, and priorities will help guide decisions about the layout, architectural style, materials, and features of your future home. Planning these elements carefully from the beginning helps align your vision with your investment.
Examples: Developing a floor plan, determining room sizes, reviewing architectural concepts, choosing must-have features, and coordinating your design with your builder and design professionals.
Ready for the next step? Explore Step 3 of our home-building guide to learn how custom design and planning bring your vision to life.
Questions to answer (FAQ)
-
How much does it cost to build a house per square foot? Give a local range with the date, and note which finishes and site conditions the range assumes.
-
How much should I set aside for surprises? Many builders recommend a contingency; state your own recommendation.
-
Do I need a down payment for a construction loan? Usually yes, and lenders often require more than for a standard mortgage. Confirm with a lender.
-
When do I pay the builder? Explain your payment schedule or draw schedule.
-
Can I build in phases to spread out costs? Explain what can be finished later, such as landscaping or a basement.


01
Communication and Initial Consultation
Every great home starts with a clear conversation about your goals, your budget, and how you want to live. The first meetings with your builder set the tone for the whole project, and the quality of that communication often predicts how smoothly the build will go.
This page explains what to expect from an initial consultation, what to bring, and which questions reveal whether a builder is the right fit. It also covers how communication should work during construction, including who your main contact is, how often you will get updates, and how changes are approved.
Your Guide to Building a Custom Home
1. What Happens in the First Consultation?
The first consultation is an opportunity to get to know your builder, discuss your vision, and determine whether you’re a good fit to work together. It’s where your ideas begin to take shape and the initial direction of your project is established. You’ll discuss your goals, property, timeline, and approximate budget, as well as the next steps involved in bringing your dream home to life.
Examples: Discussing the number of bedrooms you need, your preferred architectural style, whether you already own a property, and your ideal move-in date.
2. What to Prepare Before You Meet
Coming prepared helps make your first meeting more productive and ensures your builder understands what matters most to you. You don’t need every detail figured out, but having a general idea of your priorities, budget, and preferred style can help guide the conversation and establish realistic expectations from the beginning.
Examples: Creating a wish list, separating must-haves from nice-to-haves, collecting inspiration photos from Pinterest, bringing property or lot details, and identifying a comfortable budget range.
3. Questions to Ask a Home Builder
Choosing the right builder is one of the most important decisions you’ll make during your project. Asking the right questions helps you understand their experience, working style, and approach to managing your investment. A reputable builder should be transparent, willing to answer your questions, and able to explain how they manage the construction process from start to finish.
Examples: Asking to see previous projects, requesting client references, confirming licensing and insurance, understanding warranty coverage, and learning how unexpected costs, design changes, or construction delays are handled.
4. Red Flags to Watch For
Building a home is a significant financial commitment, so it’s important to recognize potential warning signs before signing an agreement. Clear communication, transparent pricing, and written documentation help protect both you and your builder. If something feels unclear or you’re being pressured into making a quick decision, take the time to ask questions and seek clarification.
Examples: Vague estimates with no cost breakdown, reluctance to provide references, pressure to sign immediately, unclear payment schedules, or an unwillingness to provide a detailed written contract.
5. How Communication Works During the Build
Good communication keeps your project organized and helps you stay informed as your home takes shape. Before construction begins, establish how often you’ll receive updates, who your main point of contact will be, and how important decisions will be documented. Having a clear communication plan reduces misunderstandings and helps address questions before they become larger issues.
Examples: Weekly progress updates, scheduled site visits, regular meetings with your project manager, shared schedules and project documents, and written confirmation of changes to the design or budget.
6. Fixed-Price vs. Cost-Plus Contracts
Understanding your construction contract helps you make informed financial decisions before work begins. A fixed-price contract generally sets an agreed price for a defined scope of work, while a cost-plus contract charges the actual project costs along with an agreed builder’s fee. Each approach has advantages, and the right choice depends on the project, the level of design detail, and how costs and changes are managed.
Examples: A fixed-price agreement may offer greater cost predictability when plans and specifications are well defined. A cost-plus agreement may provide flexibility when selections or project details are still evolving. In either case, clarify exclusions, allowances, change orders, fees, and how cost overruns are handled.
7. Next Step: Understanding Your Budget
Once you have a clear vision and understand the building process, the next step is establishing a realistic budget. Your budget should account for more than the construction itself, including design fees, permits, site preparation, utility connections, landscaping, and a contingency for unexpected expenses. Planning these costs early helps you prioritize your spending and make confident decisions throughout the project.
Examples: Establishing your overall spending limit, estimating construction costs, identifying potential site expenses, setting aside a contingency fund, and deciding where to invest in premium materials or finishes.
Ready to take the next step? Explore Step 2 of our home-building guide to learn how to plan your budget and understand the costs involved in building your custom home.
Questions to answer (FAQ)
-
How do I find a good home builder? Ask for referrals, review past projects, read reviews, and interview at least three builders.
-
What should I bring to my first builder meeting? A wish list, inspiration photos, a budget range, and any lot or survey information.
-
Should I get multiple quotes? Yes, but compare scope and inclusions, not just the final number.
-
How do I know if a builder is licensed and insured? Ask for proof and verify it with your local licensing authority.
-
What happens if I change my mind during the build? Changes are handled through a written change order that shows the cost and schedule impact.
02
Budget and Financing
Knowing what your home will really cost, including the expenses people often overlook, is the foundation of a stress-free build. A clear budget protects you from mid-project surprises and helps you and your builder make good choices about size, finishes, and features.
This page explains the main cost categories in a home build, how construction financing works, and how to set aside a contingency for the unexpected. Use real examples from your own projects wherever you can, because specific numbers are the content people trust and share most.
Your Guide to Building a Custom Home
1. What Goes Into the Cost of a New Home?
Building a custom home involves much more than the cost of construction. Your overall budget needs to account for everything from purchasing land and preparing the site to designing the home, selecting finishes, and completing the landscaping. Understanding these expenses early helps you plan realistically, prioritize what matters most, and avoid unexpected financial surprises as your project progresses.
Examples: Land purchase, architectural and engineering fees, permits, excavation, foundation work, construction labour, materials, kitchen cabinetry, flooring, landscaping, and furnishings.
2. Cost Per Square Foot, and Why It Can Be Misleading
Cost per square foot is often used to estimate the price of building a home, but it doesn't tell the whole story. Two homes with the same floor area can have significantly different costs depending on their layouts, finishes, complexity, and site conditions. Use this measurement as an initial reference rather than a guaranteed price, and ask your builder what is included in any estimate.
Examples: A home with a large, high-end kitchen, multiple bathrooms, custom cabinetry, and premium finishes may cost considerably more than a similarly sized home with simpler specifications. A steep lot requiring extensive excavation may also increase costs.
3. Hidden and Often Forgotten Costs
Some expenses are easy to overlook when planning a new home, particularly those related to the property itself and the finishing details. These costs can add up quickly if they aren't included in your initial budget. Reviewing potential expenses with your builder and relevant professionals helps you develop a more complete financial plan before construction begins.
Examples: Utility connections, driveway installation, retaining walls, land surveys, soil testing, tree removal, window coverings, appliances, landscaping, and final site cleanup. Depending on your property, additional drainage, access, or servicing requirements may also apply.
4. How to Set a Realistic Budget
A realistic budget starts with understanding how much you can comfortably invest in the entire project, not just the construction itself. From there, allocate funds to major categories such as design, permits, site preparation, construction, and finishing. It's also important to set aside a contingency fund for unexpected conditions or necessary changes, so one surprise doesn't put your entire project at risk.
Examples: Establishing your total spending limit, obtaining preliminary estimates, separating essential features from upgrades, tracking allowances and selections, and reserving approximately 10–20% as a contingency, depending on the project's complexity and how much uncertainty remains.
5. How Construction Loans Work
Construction financing differs from a traditional mortgage because the funds are often released in stages as work progresses. The lender may require inspections, progress reports, or other documentation before approving each payment. During construction, you may make interest-only payments on the funds drawn, depending on your loan terms. Once the home is complete, the financing may convert to a regular mortgage or require separate mortgage approval.
Examples: A lender releases funds after the foundation is completed, additional funds as the structure progresses, and further payments at later construction milestones. Before starting, speak with your lender about down payment requirements, interest rates, draw schedules, inspections, and how the loan transitions after completion.
Note: Construction loan terms vary by lender and financing arrangement.
6. Ways to Control Costs Without Lowering Quality
Managing your budget doesn't mean sacrificing good design or durable materials. Often, the biggest savings come from simplifying the home's structure, making thoughtful design decisions, and avoiding expensive changes once construction is underway. Working closely with your builder and design team helps you identify where to invest for long-term value and where simpler choices can achieve a similar result.
Examples: Choosing a simpler roofline, designing a more compact and efficient floor plan, aligning plumbing locations where practical, selecting standard-sized windows and doors, comparing material options, and finalizing finishes before construction begins.
7. Next Step: Design and Planning
With a clearer understanding of your budget, it's time to turn your ideas into a practical design. Your budget, lifestyle, property, and priorities will help guide decisions about the layout, architectural style, materials, and features of your future home. Planning these elements carefully from the beginning helps align your vision with your investment.
Examples: Developing a floor plan, determining room sizes, reviewing architectural concepts, choosing must-have features, and coordinating your design with your builder and design professionals.
Ready for the next step? Explore Step 3 of our home-building guide to learn how custom design and planning bring your vision to life.
Questions to answer (FAQ)
-
How much does it cost to build a house per square foot? Give a local range with the date, and note which finishes and site conditions the range assumes.
-
How much should I set aside for surprises? Many builders recommend a contingency; state your own recommendation.
-
Do I need a down payment for a construction loan? Usually yes, and lenders often require more than for a standard mortgage. Confirm with a lender.
-
When do I pay the builder? Explain your payment schedule or draw schedule.
-
Can I build in phases to spread out costs? Explain what can be finished later, such as landscaping or a basement.
03
Design
Design is where your ideas become a floor plan that fits your lifestyle, your lot, and your budget. It is also the stage where changes are cheapest, so every hour spent here saves money and stress during construction.
This page explains how the design process moves from first sketches to final construction drawings, who is involved, and how to make decisions you will still love years from now. Show real floor plans, renderings, and before-and-after photos from your own work to make this page stand out.
Your Guide to Building a Custom Home
1. The Design Process, Step by Step
Designing a custom home is a collaborative process that turns your ideas into a detailed, buildable plan. It begins with understanding your needs, lifestyle, and budget, then progresses through concept sketches, floor plans, exterior design, and detailed construction drawings. Taking the time to review each stage helps ensure your home reflects your vision before construction begins.
Examples: Creating a wish list, reviewing initial sketches, adjusting room layouts, exploring exterior materials, viewing 3D renderings, and approving final drawings for permitting and construction.
2. Who Is on the Design Team?
A successful custom home project often involves several professionals working together to bring your vision to life. Each person contributes specialized knowledge, from the overall appearance and functionality of your home to its structural integrity and interior finishes. Understanding their roles helps you know who to contact for different decisions and how your team will coordinate throughout the project.
Examples: An architect or home designer develops the plans, a structural engineer designs key structural elements, an interior designer helps select finishes and fixtures, and your builder coordinates construction planning, practical considerations, and project execution. The exact team depends on your home's complexity and local requirements.
3. Custom, Semi-Custom, or Spec: Which Is Right for You?
Not every homeowner needs the same level of design freedom. Understanding the differences between custom, semi-custom, and spec homes helps you choose an approach that suits your budget, timeline, and priorities. The right option depends on how much personalization you want and how involved you'd like to be in the design process.
Examples:
-
Custom home: Designed around your specific property, lifestyle, and preferences, offering the greatest flexibility.
-
Semi-custom home: Starts with an existing plan or design, allowing selected changes to layouts, finishes, and features.
-
Spec home: Built by a developer or builder based on their chosen design and specifications, often with fewer opportunities for customization.
4. Designing for Your Lot
Your property plays a major role in how your home should be designed. Factors such as sunlight, views, slope, privacy, access, and local zoning requirements can influence the home's layout, orientation, and overall construction costs. Designing with the lot in mind helps maximize its potential while addressing practical limitations before they become expensive challenges.
Examples: Positioning living areas to capture natural light, placing windows to take advantage of mountain or ocean views, designing around a sloped site, creating privacy from neighbouring homes, and checking setbacks and height restrictions before finalizing plans.
5. Floor Plan Planning Checklist
A well-designed floor plan should support how you live today while accommodating your needs in the future. Beyond the appearance of individual rooms, consider how people move through the home, where everyday items will be stored, and how indoor and outdoor spaces connect. Careful planning can improve comfort, functionality, and long-term value.
Examples: Ensuring smooth flow between the kitchen and dining area, including sufficient storage, maximizing natural light, planning an efficient kitchen layout, creating a private primary suite, adding a home office, and considering wider doorways or a main-floor bedroom for aging in place.
6. Energy Efficiency and Building Performance
Energy efficiency should be considered early in the design process rather than treated as an afterthought. Decisions about insulation, windows, air sealing, ventilation, and heating and cooling systems affect your home's comfort, energy consumption, and long-term operating costs. Working with qualified professionals helps ensure these elements work together and meet applicable building code requirements.
Examples: Selecting energy-efficient windows, improving insulation, reducing unwanted air leakage, planning balanced ventilation, and choosing an appropriately sized heat pump or other suitable heating and cooling system.
7. How Many Design Revisions Should You Expect?
Design revisions are a normal part of creating a custom home. They allow you to refine layouts, reconsider materials, and resolve issues before construction begins. However, frequent changes late in the process can delay approvals, require additional design work, and increase costs. Establishing clear review stages and decision deadlines helps keep your project moving forward.
Examples: Reviewing floor plans before exterior elevations, consolidating feedback from everyone involved, confirming room dimensions early, and finalizing major selections before construction drawings are completed. Ask your design team how revisions are handled and whether additional changes incur fees.
8. Next Step: Land and Site Selection
Before moving into construction, it's important to ensure the property is suitable for the home you want to build. Evaluating zoning, site conditions, access, servicing, and potential development restrictions helps you understand what is possible and what additional costs may arise. Ideally, land selection and design should inform one another so your vision fits the property.
Examples: Reviewing zoning regulations, checking utility availability, investigating soil and drainage conditions, assessing slope and excavation requirements, and confirming that your intended home can fit within applicable setbacks and height limits.
Already own your land? Your process may look a little different. Site assessment and preliminary design can happen together, and your existing property's conditions will help guide the design from the beginning.
Ready for the next step? Explore Step 4 of our home-building guide to learn how to evaluate land, understand site conditions, and prepare your property for construction.
Questions to answer (FAQ)
-
How long does it take to design a custom home? Give a typical range and explain what speeds it up.
-
How much does home design cost? Explain common pricing models: percentage of construction cost, flat fee, or included in a design-build contract.
-
Can I use a stock plan and change it? Yes, but explain the cost and code review needed for changes.
-
What are construction drawings? Explain they are the detailed plans used for permits and building.
-
When should I choose finishes? Early, because choices affect structure, electrical, and plumbing layout.


04
Land and Site Selection
The right lot shapes everything from your floor plan to your final cost, and the wrong lot can bring costly surprises. A beautiful piece of land is only a good buy if you can actually build the home you want on it.
This page explains what to check before you buy, which professionals to involve, and how site conditions such as slope, soil, water, and access change your budget. If you already own land, the same checklist helps you confirm what is possible and what it will cost.
Your Guide to Building a Custom Home
1. Start With Your Goals
Choosing the right property is the foundation of a successful custom home project. Before purchasing land, think about how you want to live, what matters most to your family, and how the property will support your long-term plans. The right location should balance your lifestyle, budget, and vision for your future home.
Examples: Deciding whether you want mountain or ocean views, a larger yard, more privacy, convenient access to work, nearby schools, or enough space for a workshop, garden, or future secondary suite.
2. Zoning, Setbacks, and What You Are Allowed to Build
Not every property can accommodate every type of home. Local zoning regulations determine what you can build and may restrict building height, lot coverage, setbacks from property lines, and the use of secondary suites or detached structures. Understanding these restrictions before purchasing land helps you avoid investing in a property that cannot accommodate your plans.
Examples: Checking the maximum permitted building height, determining how close your home can sit to property boundaries, confirming whether a secondary suite is allowed, and checking whether a detached garage or garden suite can be built. Always verify requirements with the local municipality.
3. Utilities and Access
A property may look ideal, but access to essential services can significantly affect the cost and complexity of construction. Before committing to a purchase, confirm how the property will connect to water, sewer or septic systems, electricity, gas, and internet. You should also consider whether construction vehicles and emergency services can safely access the site.
Examples: Confirming municipal water and sewer connections, investigating the cost of extending electrical service, checking internet availability, determining whether a driveway entrance needs approval, and identifying whether a private road requires maintenance agreements.
4. Soil, Slope, and Drainage
The physical condition of your property can have a major impact on your home's design, foundation, and construction budget. Sloped land, unstable soil, groundwater, or poor drainage may require additional engineering and site preparation. Surveys and geotechnical assessments help identify potential challenges early, allowing your design and construction team to plan accordingly.
Examples: Conducting a geotechnical investigation to assess soil stability, obtaining a survey to confirm property boundaries and elevations, evaluating drainage patterns, and identifying whether retaining walls, specialized foundations, excavation, or additional drainage systems may be necessary.
5. Environmental and Hazard Checks
Environmental conditions and local development restrictions can affect where and how you build. Depending on the property, you may need to investigate flood risks, steep slopes, protected trees, environmentally sensitive areas, or restrictions near streams and other bodies of water. Identifying these considerations early helps you understand potential limitations, additional costs, and approval requirements.
Examples: Checking floodplain maps, confirming streamside protection requirements, determining whether protected trees can be removed, investigating wildfire exposure, and reviewing applicable environmental assessments or development permit requirements.
6. Easements, Covenants, and Title
Before purchasing land, it's important to understand the legal restrictions and rights associated with the property. Easements may allow others to access or maintain utilities on your land, while covenants can limit how the property is developed or used. Reviewing the title and relevant legal documents helps identify restrictions that could affect your proposed home.
Examples: Discovering a utility easement where a garage was planned, identifying a shared driveway agreement, checking a covenant that limits building height or exterior design, or confirming legal access to the property. A qualified real estate lawyer or notary can help review title documents and explain their implications.
7. Due Diligence Checklist Before You Buy
Purchasing land is a major investment, and completing the right checks before committing can help prevent costly surprises. Use this checklist as a starting point when evaluating a property. The specific investigations required will depend on the location, terrain, intended design, and local regulations.
Land Purchase Checklist
Check off each item as you complete your review.
-
Confirm zoning and permitted uses
-
Verify setbacks, height limits, and lot coverage
-
Review title, easements, and covenants
-
Confirm legal road and driveway access
-
Check water, sewer or septic, power, gas, and internet
-
Obtain a property survey and confirm boundaries
-
Investigate soil conditions, slope, and drainage
-
Review flood, environmental, and other hazard risks
-
Estimate site preparation, excavation, and retaining wall costs
-
Confirm permit requirements with the municipality
-
Review development costs and your overall budget
-
Have relevant professionals review outstanding concerns before removing purchase conditions
Important: Where appropriate, make your purchase conditional on satisfactory due diligence and professional review. Consult your real estate professional and lawyer or notary about suitable contract conditions and deadlines.
8. Next Step: Permits and Approvals
Once you've selected a suitable property and confirmed what can be built, the next stage is understanding the permits and approvals required for your project. Depending on the location and complexity of your home, this may involve development permits, building permits, engineering documents, and other municipal or provincial requirements. Planning ahead helps reduce delays and ensures your project meets applicable regulations before construction begins.
Examples: Preparing construction drawings, submitting building permit applications, obtaining engineering approvals, addressing municipal review comments, and confirming any tree removal, demolition, or development permit requirements.
Ready for the next step? Explore Step 5 of our home-building guide to learn about permits, municipal approvals, and what needs to happen before construction can begin.
Questions to answer (FAQ)
-
Can I build on any piece of land? No. Zoning, utilities, access, and site conditions all decide whether a lot is buildable.
-
How do I know if a lot is buildable? Check with the local planning department, review zoning, and hire a surveyor and, where needed, a geotechnical engineer.
-
How much does it cost to prepare a lot? It varies widely with clearing, grading, utilities, and drainage; get site-specific quotes.
-
Should I talk to a builder before buying land? Yes. A builder can flag costs and design limits before you commit.
-
What is a survey and why do I need one? A survey shows boundaries, easements, elevations, and what can fit on the lot.


05
Permits and Approvals
Before any work begins, your plans need approval from your local authority, and that approval is one of the biggest sources of schedule delays. A complete, well-prepared application moves faster than one that comes back with questions.
This page breaks down the permit process, what documents are usually required, how long it can take, and how an experienced builder keeps the project moving. Rules differ by municipality, so always point readers to your local building department and keep the details specific to your area.
Your Guide to Building a Custom Home
1. What Is a Building Permit and Why Do You Need One?
A building permit is an official authorization from the local authority to carry out specified construction work. It helps ensure that your proposed home meets applicable building code requirements and that the project complies with relevant zoning and other regulations. Obtaining the required permits before construction protects your investment and helps prevent costly corrections, enforcement issues, or delays later on.
Examples: Building a new home, constructing an addition, or making structural changes may require a building permit. The exact requirements depend on your municipality and the scope of work.
2. Which Permits Does a New Home Usually Need?
Building a new home can involve several permits and approvals, depending on the property's location, design, and servicing requirements. Some applications may be handled separately from the main building permit, while others may be coordinated through the municipality or relevant utility providers. Identifying these requirements early helps your team plan the project properly.
Examples: Building, plumbing, and electrical permits; mechanical or heating system approvals where required; driveway or access permits; and, where applicable, tree removal, demolition, environmental, or development permits.
3. What Do You Need to Apply?
A complete permit application gives the municipality the information it needs to review your proposed home. Preparing accurate drawings, site information, and supporting documents early can help reduce requests for additional information and keep the approval process moving. The required documents vary depending on the municipality, property, and complexity of the project.
Examples: Architectural and construction drawings, a site plan, property survey, structural engineering documents, energy-compliance information, drainage plans, and completed application forms. Additional geotechnical or other reports may be required for certain properties.
4. The Permit Process, Step by Step
The permitting process typically begins once your design and supporting documents are ready for submission. The municipality reviews the application for compliance with applicable regulations and may request clarifications or revisions before issuing approval. Staying organized, responding promptly to review comments, and coordinating your consultants can help keep the process on track.
Examples:
-
Submit the application and supporting documents.
-
The municipality checks the application for completeness.
-
Building officials review the plans and identify any outstanding requirements.
-
Your design team addresses comments and submits revisions.
-
Outstanding fees, conditions, and supporting approvals are completed.
-
The permit is issued, allowing the authorized work to begin.
The exact sequence varies by municipality, and some approvals may need to be obtained before a building permit can be issued.
5. How Long Does It Take?
Permit timelines depend on the municipality, project complexity, application completeness, and whether additional approvals are required. A straightforward application may move more quickly than a complex custom home involving steep terrain, environmental restrictions, or significant design revisions. It's important to allow time for permitting when planning your construction schedule rather than assuming work can begin immediately after submitting the application.
Examples: The City of North Vancouver publishes an average processing time of approximately 11–12 months for new construction, while noting that timelines vary by project complexity. This is a municipal benchmark, not a guaranteed timeline for West Vancouver or every North Shore project. Incomplete applications, consultant revisions, and outstanding development approvals can add time.
Our advice: Begin discussions with the relevant municipality early and build a realistic approval period into your project schedule.
6. Permit Fees and Development Charges
Permit expenses extend beyond the basic building permit fee. Depending on the project, you may need to budget for trade permits, development cost charges, engineering reviews, inspections, deposits, and other municipal fees. These amounts depend on the property's location, construction value, project scope, and applicable bylaws, so they should be confirmed before finalizing your budget.
Examples: In West Vancouver, the building permit fee for construction valued above $750,000 is calculated using a base fee plus an additional amount for each $1,000 of construction value above that threshold. Separate electrical and plumbing permit fees may also apply. Development cost charges can be additional.
You can review the official District of West Vancouver permit fees and regulations for current fee schedules.
Budget tip: Ask for a breakdown of anticipated municipal fees, consultant costs, utility charges, and refundable deposits so you understand which costs are included in your construction budget.
7. Inspections During Construction
Receiving a building permit is only the beginning. During construction, required inspections help verify that work complies with approved plans, applicable building codes, and relevant safety requirements. Inspections must be coordinated at the appropriate stages, often before work is covered up, so any issues can be identified and addressed promptly.
Examples: Depending on the project and local requirements, inspections may include excavation and foundations, drainage, framing, plumbing, electrical work, insulation and air-barrier details, and final completion. Your builder should coordinate the construction schedule around required inspections and ensure outstanding items are resolved before proceeding.
8. Who Handles the Permits: You or Your Builder?
Permit responsibilities should be clearly established before the project begins. Depending on the municipality and project arrangement, the homeowner, builder, architect, or another authorized professional may prepare, submit, or coordinate different applications. At West Coast Turn Key, we help homeowners understand the approvals required for their project and coordinate with the appropriate design professionals, consultants, and authorities as agreed upon for the build.
Examples: Helping identify required permits, coordinating construction drawings and engineering documents, tracking outstanding approvals, communicating with consultants, and planning construction around permit issuance and inspections.
Our goal is to make the process easier to navigate, keep everyone informed, and help ensure the necessary approvals are in place before the relevant work begins. Specific application and sign-off responsibilities will be confirmed for each project.
9. Next Step: Site Preparation & Foundation
Once the necessary permits have been issued and pre-construction requirements have been satisfied, your project can move toward site preparation and foundation work. This stage transforms your approved plans into a physical building site. Proper planning, excavation, drainage, and foundation construction are essential to creating a safe, stable starting point for your new home.
Examples: Arranging site access, establishing erosion and sediment controls where required, preparing the property, completing excavation, installing required drainage and underground services, constructing formwork, placing reinforcing steel, and pouring the foundation in accordance with the approved plans.
Ready to break ground? Explore Step 6 of our home-building guide to learn what happens during site preparation, excavation, and foundation construction—and what homeowners should expect before the structure begins to take shape.
Questions to answer (FAQ)
-
Do I need a permit to build a house? In almost every case, yes. Confirm with your local building department.
-
How long does it take to get a building permit? Give your local range and say that complete applications are reviewed faster.
-
Who applies for the permit? Often the builder or designer, with the owner's authorization.
-
What happens if I build without a permit? It can lead to stop-work orders, fines, and trouble selling or insuring the home.
-
Can the permit be refused? Yes, if the plans do not meet code or zoning, but most issues are fixed with revisions.


06
Site Preparation and Foundation
This is the stage where your plans first take physical shape on the ground. Everything above the foundation depends on it, so getting site preparation and foundation work right matters for the entire life of your home.
This page explains what happens from the first day of site work through the finished foundation, including clearing, excavation, footings, walls, waterproofing, and inspections. Use photos from real projects at each stage, because homeowners love seeing what the process looks like.
Your Guide to Building a Custom Home
1. Site Preparation: Clearing, Grading & Temporary Access
Site preparation transforms your property into a safe, organized construction site. Before excavation begins, the team establishes access, clears approved areas, identifies the building location, and puts necessary safety and environmental measures in place. Proper preparation helps protect the surrounding property and ensures construction can proceed efficiently.
Examples: Removing approved trees and vegetation, installing temporary fencing, setting up erosion and sediment controls, arranging temporary power, establishing construction vehicle access, and surveying and staking the location of your new home.
2. Excavation
Excavation involves removing soil and other material to create space for the foundation, basement, and underground services. The depth and extent of excavation depend on your home's design, the property's slope, and the ground conditions. Unexpected rock, groundwater, or unsuitable soil can affect both the construction schedule and budget, making proper site investigation especially important.
Examples: Digging for foundation footings, excavating a basement, removing excess soil, managing groundwater, and arranging additional engineering or soil stabilization if unexpected conditions are discovered.
3. Footings & Foundation Walls
The foundation transfers the weight of your home into the ground below. Footings distribute that load, while foundation walls support the structure and, where applicable, retain the surrounding soil. Reinforcement, concrete placement, and proper curing must follow the approved structural design and specifications to help ensure the foundation performs as intended.
Examples: Setting up formwork, installing reinforcing steel, arranging required inspections, pouring concrete footings and walls, and allowing the concrete to cure sufficiently before proceeding with subsequent work.
4. Foundation Types Compared
The right foundation depends on the property, soil conditions, climate, design, budget, and how you intend to use the space. Your builder and design professionals can help determine which option best suits your project.
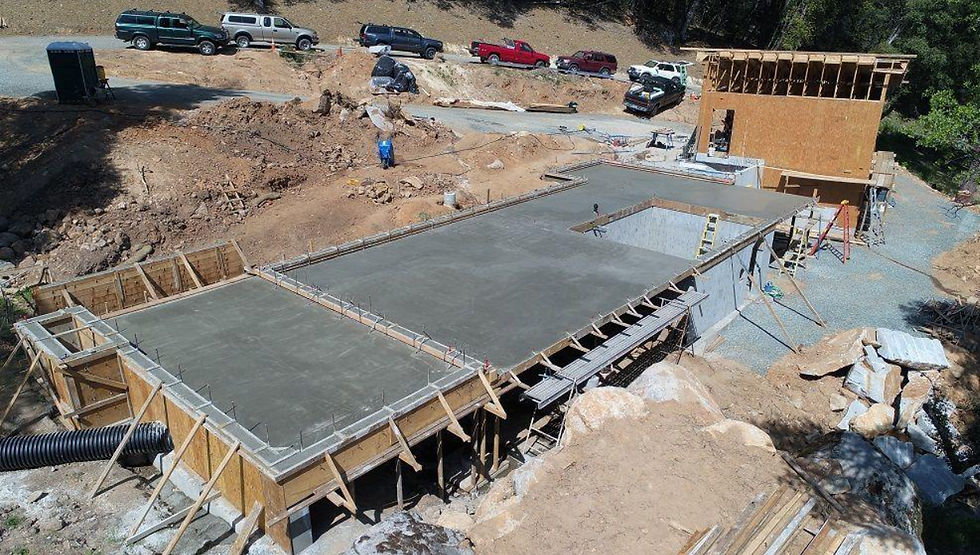


5. Waterproofing & Drainage
Keeping water away from the foundation is critical to protecting your home. Appropriate waterproofing or damp-proofing, foundation drainage, and surface grading help manage moisture and reduce the risk of water entering below-ground spaces. The right solution depends on soil conditions, groundwater levels, foundation design, and local requirements.
Examples: Applying the specified foundation membrane, installing perimeter drain tile, protecting waterproofing before backfill, directing downspouts away from the foundation, and ensuring the finished ground slopes appropriately to manage surface water.
6. Underground Services
Before the foundation area is fully covered or construction advances, essential services must be installed and coordinated with the home's design. These connections allow your home to receive water, electricity, and other utilities while safely managing wastewater and drainage. Planning their locations early helps avoid conflicts with foundations, driveways, landscaping, and other site features.
Examples: Installing water and sewer connections, preparing an approved septic system where required, coordinating electrical conduits and gas services, and installing necessary underground drainage and service lines.
The exact timing depends on the utility provider, municipal requirements, inspections, and the construction sequence.
7. Inspections at This Stage
Inspections help verify that important foundation and underground work meets approved plans and applicable requirements before it becomes concealed. Some work must be inspected before concrete is poured or trenches are covered, so scheduling inspections at the right time is essential. Your builder should coordinate the work with the relevant inspectors and address any outstanding items before proceeding.
Examples: Footing and reinforcing inspections, foundation or structural checks where required, underground plumbing inspections, drainage verification, and confirmation of applicable waterproofing or site requirements before backfilling.
The exact inspection stages vary by municipality and project.
8. How Long Does This Stage Take?
Site preparation and foundation work can take several weeks, but the schedule depends on the home's size, foundation type, site access, weather, and ground conditions. A straightforward site may progress relatively quickly, while steep terrain, rock excavation, groundwater, retaining walls, or complex servicing can extend the timeline.
Your builder should provide a project-specific schedule and update it if unexpected conditions arise.
Examples of common delays:
-
Heavy rain or unsuitable ground conditions.
-
Unexpected rock, groundwater, or unstable soil.
-
Additional excavation or retaining wall requirements.
-
Delays in concrete deliveries or utility connections.
-
Inspection availability or work that needs correction.
Planning for contingencies at this stage helps reduce disruption to the rest of the build.
9. Next Step: Framing
Once the foundation has been completed, the necessary inspections are passed, and the site is ready for the next phase, framing begins. This is when your home starts to become recognizable, as the walls, floors, roof structure, and major openings take shape. Accurate framing establishes the layout and structure that will support the rest of the construction process.
Examples: Installing floor systems, erecting exterior and interior wall frames, constructing the roof structure, creating window and door openings, and coordinating structural beams and supports according to the approved plans.
Ready to see your home take shape? Explore Step 7 of our home-building guide to learn how framing works, what happens during this stage, and how your home's structure comes together.
Questions to answer (FAQ)
-
What type of foundation is best for my house? It depends on soil, climate, slope, budget, and whether you want a basement.
-
How long does a foundation take? Give a typical range from excavation to ready-for-framing, noting curing and inspections.
-
Can you build a foundation in winter or rain? Sometimes, with precautions; explain how your team handles it.
-
Why do we need a geotechnical report? It tells engineers how the soil will carry the building.
-
What is backfilling? Refilling soil around the foundation after inspection and waterproofing.


Slab on Grade
A concrete slab is constructed on a prepared base, with the required insulation, reinforcement, and services incorporated into the design.
Advantages
Often simpler and faster to construct, with no conventional basement excavation.
Considerations
Limited below-floor storage and careful planning needed for plumbing and other services.
Often suitable for sites where ground conditions and design make a slab practical.
Crawl Space
An elevated floor sits above a shallow foundation, leaving an accessible space beneath part or all of the home.
Advantages
Can provide access to certain plumbing and services without a full basement.
Considerations
Requires appropriate moisture control, insulation, ventilation or conditioning as designed, and ongoing maintenance access.
May suit particular site elevations and house designs.
Full Basement
A below-ground level creates additional enclosed space beneath the main floor.
Advantages
Provides opportunities for storage, mechanical rooms, recreation areas, or additional living space where permitted.
Considerations
Typically involves more excavation, concrete, waterproofing, drainage, and potentially greater groundwater management costs.
May be attractive where the terrain, budget, and design support below-ground space.

07
Framing and Structure
Framing is the moment your home's layout becomes real, and it is often the most exciting milestone to watch. Walls, floors, and the roof go up, and you can finally walk through the rooms you have only seen on paper.
This page explains what framing includes, how long it typically takes, the materials and methods used, and what to look for on site visits. It is also the best time to confirm details like window locations, ceiling heights, and outlet placement, because changes get harder and more expensive afterward.
Your Guide to Building a Custom Home
1. What Is Framing?
Framing is the structural framework that forms the skeleton of your home. It supports the floors, walls, and roof while creating the spaces for bedrooms, bathrooms, kitchens, windows, and doors. Accurate framing is essential because it influences the home's strength, layout, and the installation of everything that follows.
Examples: Building exterior and interior walls, installing floor joists and structural beams, constructing roof trusses, and adding structural sheathing to walls and roof sections.
2. The Framing Sequence
Framing typically follows a planned sequence, starting with the floor system and progressing upward through the walls and roof. Each component must be properly aligned, secured, and coordinated with the structural drawings and other building requirements. Once the main framework and sheathing are complete, the team can begin preparing the home for weather protection and subsequent trades.
Examples of the typical sequence:
-
Install the floor system over the foundation.
-
Frame the exterior and interior walls.
-
Install the second-floor structure for multi-storey homes.
-
Construct the roof using engineered trusses or rafters.
-
Apply structural sheathing where specified.
-
Install the required weather-resistive barrier and coordinate exterior openings.
The exact order may vary depending on the home's design and construction method.
3. Materials & Building Methods Compared
The framing system affects structural performance, energy efficiency, construction time, design flexibility, and cost. The best option depends on the project's requirements, local conditions, the design team, and the experience of the construction crew.


4. Windows, Doors & Getting the House “Dried In”
Once the main structure is complete, the next priority is protecting the home from the weather. This process, often called getting the house “dried in,” involves installing the appropriate roofing, weather barriers, windows, exterior doors, and other components that help keep rain and moisture out. Reaching this milestone allows interior work to progress with better protection from the elements.
Examples: Installing roof coverings, fitting exterior windows and doors, applying weather-resistive barriers, sealing openings, and completing exterior detailing to manage water intrusion.
Important: “Dried in” does not necessarily mean the home is fully waterproof or airtight. Proper flashing, drainage details, and inspections remain essential.
5. Structural Inspections
Before framing is concealed by insulation and interior finishes, required inspections help verify that the structure meets approved plans and applicable building requirements. These checks are important for identifying issues while the relevant components are still accessible. Your builder should coordinate inspections and resolve any deficiencies before the work proceeds to the next stage.
Examples: Checking structural beams and posts, load-bearing walls, roof framing, connections and bracing, fastening patterns, and compliance with approved engineering drawings. Additional checks may apply depending on the construction method and local requirements.
6. The Framing Walkthrough
The framing walkthrough is your opportunity to walk through the home's layout with your builder while changes may still be easier to make. Even with approved drawings, standing inside the actual spaces can reveal details you want to reconsider before plumbing, electrical work, insulation, and drywall begin. Review your plans carefully and discuss any concerns before authorizing changes.
Use this walkthrough checklist:
-
Confirm bedroom, bathroom, and living-space layouts.
-
Check ceiling heights and the feel of each room.
-
Review window locations, sizes, and expected views.
-
Confirm door swings, entryways, and hallway widths.
-
Check stair locations, clearances, and access between floors.
-
Review kitchen island placement and appliance locations.
-
Confirm storage areas, closets, and mechanical room access.
-
Identify locations for televisions, built-ins, and other planned features.
-
Raise any concerns about privacy, natural light, or furniture placement.
-
Record requested changes and confirm their cost and schedule implications with your builder.
Our advice: Bring your approved floor plans and a list of questions. Any changes should be reviewed by the appropriate design or engineering professional and approved where necessary before work proceeds.
7. How Long Does Framing Take?
Framing can take several weeks or longer, depending on the size and complexity of the home, the construction method, weather conditions, crew availability, and material deliveries. A straightforward home may progress faster than a multi-storey custom build with complex rooflines, large structural openings, or extensive architectural detailing.
Examples of potential delays:
-
Complicated structural designs requiring additional coordination.
-
Rain or other weather conditions affecting safe work and material protection.
-
Delays in lumber, engineered beams, windows, or roof trusses.
-
Changes to the approved layout after framing has begun.
-
Inspection scheduling or corrections to work that does not meet requirements.
Your builder should keep you informed of progress and explain how any delays affect the wider construction schedule.
8. Next Step: Mechanical, Electrical & Plumbing
With the home's structural framework in place, the next stage involves installing the systems that make it comfortable, functional, and ready for everyday living. Mechanical, electrical, and plumbing work is commonly coordinated while walls and ceilings remain open, allowing the trades to install and inspect their systems before insulation and drywall conceal them.
Examples: Installing plumbing supply and drain lines, electrical wiring and outlets, heating and cooling equipment, ventilation ductwork, and bathroom exhaust systems.
Ready for the next stage? Explore Step 8 of our home-building guide to understand how mechanical, electrical, and plumbing systems are installed, what decisions homeowners need to make, and how to prepare for the next phase of construction.
-
Questions to answer (FAQ)
-
How long does it take to frame a house? Give a realistic range and explain how size and weather change it.
-
Can I make changes during framing? Small changes are possible, but they cost more now than during design.
-
What is a dried-in house? The roof, windows, and exterior doors are installed so interior work can continue regardless of weather.
-
What is a framing inspection? A check that the structure meets plans and code before it is covered.
-
Is wood framing the best choice? It is the most common, but other methods may suit certain climates, budgets, and goals.
Wood Frame
A widely used residential construction method using timber studs, joists, beams, and sheathing.
Advantages: Widely available materials, familiar construction methods, and flexible design options.
Considerations: Requires proper moisture management, structural detailing, and protection during construction.
Steel Frame
Uses steel structural members or light-gauge steel studs, depending on the design.
Advantages: Consistent dimensions, resistance to rot and wood-damaging insects, and suitability for certain structural applications.
Considerations: Thermal bridging, corrosion protection, and specialized detailing need careful attention.
Structural Insulated Panels (SIPs)
Factory-made panels combine structural facings with an insulating core.
Advantages: Can provide efficient installation and a well-insulated building envelope when correctly detailed.
Considerations: Requires careful design coordination, panel-joint detailing, and planning for services and future modifications.
Insulated Concrete Forms (ICF)
Insulating forms hold reinforced concrete to create walls, commonly used for foundations and sometimes above-grade walls.
Advantages: Strong concrete walls with integrated insulation and useful thermal performance.
Considerations: Requires specialized installation, concrete placement planning, and coordination of openings and services.
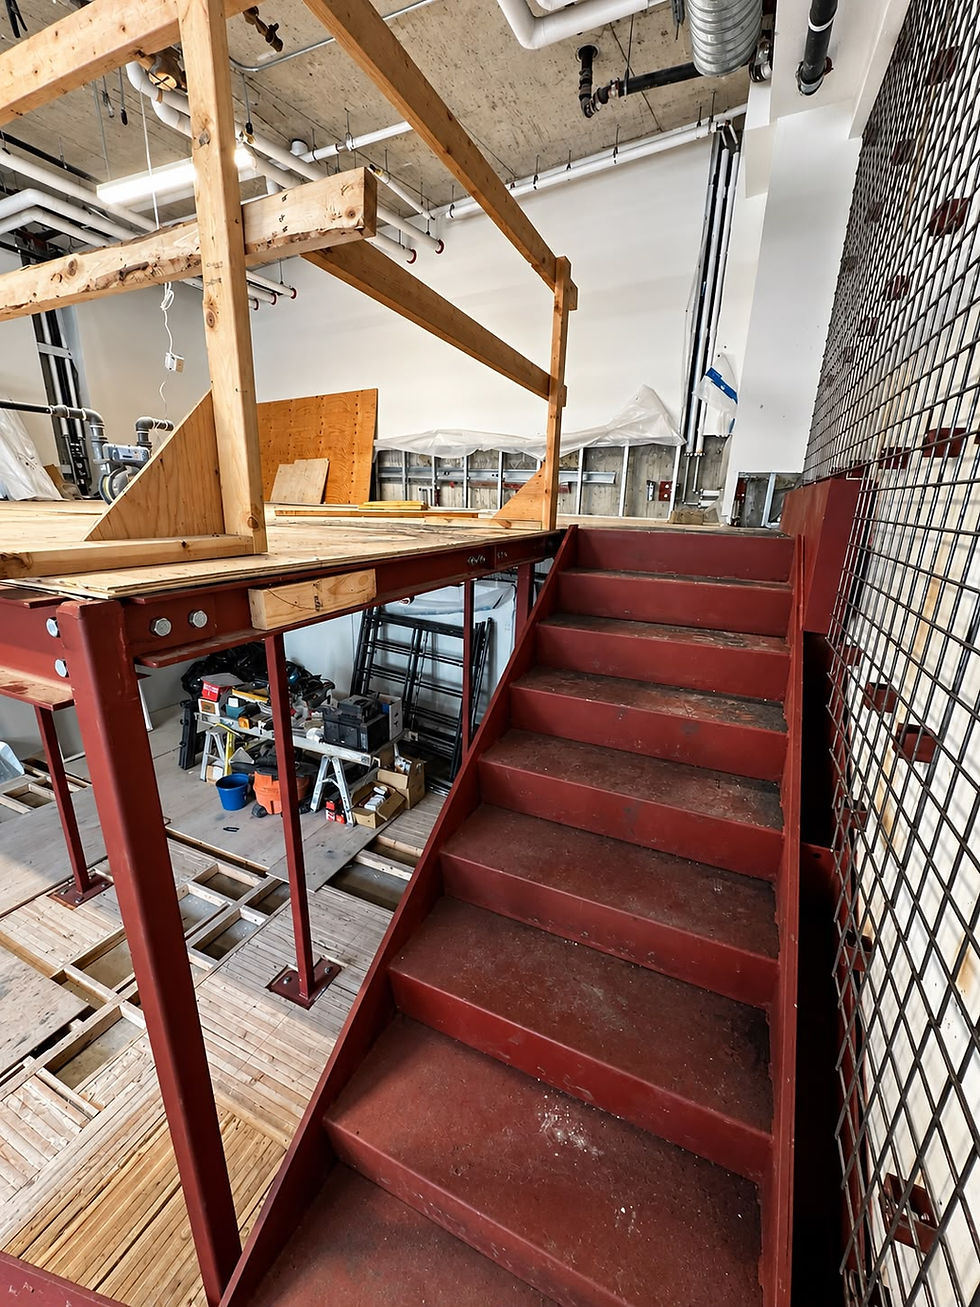
Your builder and design professionals can help compare these options based on your home's design, energy goals, budget, and local building requirements.


08
Mechanical, Electrical, and Plumbing (MEP)
Behind your walls is the system that keeps your home comfortable, powered, and running smoothly. This stage is called the rough-in, and it is the last chance to add wiring, pipes, and ducts without opening finished walls.
This page explains what happens during rough-in, how plumbers, electricians, and heating and cooling contractors coordinate, and which upgrades are worth planning now rather than later. Walking through the home with your builder before drywall is one of the most valuable steps in the entire process.
Your Guide to Building a Custom Home
1. What Does MEP Mean?
MEP stands for Mechanical, Electrical, and Plumbing. These three systems work together to provide heating, cooling, ventilation, lighting, power, and running water throughout your home. Although much of this work is hidden once construction is complete, it has a major impact on comfort, safety, efficiency, and long-term maintenance.
Examples:
-
Mechanical: Heating, air conditioning, ventilation, and indoor air quality.
-
Electrical: Wiring, outlets, switches, lighting, electrical panels, and power distribution.
-
Plumbing: Water supply, drains, waste pipes, fixtures, and hot water systems.
2. The Rough-In Sequence
Rough-in is the stage when the main pipes, wiring, ductwork, and other services are installed before walls and ceilings are closed up. The trades need to coordinate their work carefully to avoid conflicts and ensure that everything fits within the planned spaces. Completing this stage correctly makes later inspections and finishing work much easier.
Examples: Installing water supply and drain pipes, routing heating and ventilation ductwork, running electrical wiring, and adding low-voltage cables for internet, security, and audio systems. The exact sequence varies depending on the design and coordination between trades.
3. Heating and Cooling Options
Your heating and cooling system affects indoor comfort, energy use, and operating costs. The best solution depends on your home's size, insulation, layout, budget, and energy goals. Discussing options early allows the mechanical designer or qualified contractor to size the system properly and coordinate it with the home's ventilation requirements.


4. Electrical Planning
Electrical planning is about more than deciding where the lights go. Your home's electrical layout should support your daily routines, furniture arrangements, appliances, and future technology. Reviewing these details before wiring begins helps reduce the need for extensions, relocations, or expensive changes after the walls are finished.
Examples: Planning sufficient outlets in bedrooms and living areas, placing switches at convenient entrances, adding task lighting in the kitchen, providing dedicated circuits for major appliances, and discussing electrical panel capacity with your electrician.
Consider where you might want exterior lighting, landscape lighting, workshop equipment, or additional appliances in the future. All electrical work should comply with applicable codes and be completed by appropriately qualified professionals.
5. Smart Home and Low-Voltage Wiring
Smart home and low-voltage systems can make your home easier to manage, more secure, and better connected. Installing suitable cabling and conduits while the walls are open is often simpler than adding them after construction. Even if you don't plan to install every system immediately, preparing for future upgrades can give you greater flexibility.
Examples: Ethernet connections for home offices and televisions, wireless access point locations, security cameras, alarm systems, doorbell cameras, whole-home audio, and wiring for automated blinds or smart lighting.
Discuss your priorities with your builder and technology installer so cable routes, equipment locations, and power requirements are coordinated before drywall installation.
6. EV Charger and Solar Readiness
Planning for electric vehicle charging and potential solar panels during construction can reduce the cost and disruption of future upgrades. Installing suitable conduit, reserving space for equipment, and assessing electrical panel capacity early can be easier than modifying completed walls, driveways, or electrical systems later. However, the required capacity depends on your home's electrical design and anticipated future loads.
Examples: Installing conduit from the electrical panel to the garage, planning a dedicated EV charging circuit, reserving suitable space for future electrical equipment, and coordinating roof design and wiring routes for a potential solar installation.
Ask your electrician to assess panel capacity, service size, load management options, and any applicable utility requirements rather than assuming a larger panel or circuit will automatically be needed.
7. Plumbing Planning
Plumbing decisions affect convenience, water efficiency, maintenance access, and construction costs. Confirming fixture locations and hot water requirements before rough-in helps prevent conflicts with cabinetry, structural components, and other systems. It's also worth considering how easily key plumbing components can be accessed if maintenance is needed in the future.
Examples: Finalizing kitchen sink and dishwasher locations, choosing shower and bathtub configurations, planning bathroom fixtures, selecting a suitable water heater, and locating accessible shutoff valves. Discuss whether a conventional tank, tankless system, or heat pump water heater best suits your household and home design.
8. Inspections and the Pre-Drywall Walkthrough
Before insulation and drywall cover the rough-in work, required inspections must be completed and the systems should be reviewed for coordination and accessibility. This is one of the last opportunities to identify missing outlets, misplaced pipes, awkward equipment access, or other concerns while everything remains visible.
Pre-drywall checklist:
-
Confirm outlet, switch, and lighting locations.
-
Review kitchen, bathroom, and laundry plumbing locations.
-
Verify heating and cooling vents and equipment placement.
-
Confirm network cables, security wiring, and smart home provisions.
-
Check provisions for EV charging and future technology.
-
Ensure shutoff valves, cleanouts, and service access are practical.
-
Confirm required plumbing, electrical, and other inspections are complete.
-
Ask your builder to document concealed services and any approved changes.
-
Confirm outstanding deficiencies are addressed before walls are closed.
Our advice: Walk through the home with your builder and, where appropriate, the relevant trades. Photographing visible pipe and cable routes before they are covered can also help with future maintenance.
9. Insulation and Air Sealing
Once rough-in work and required inspections are complete, the home can be prepared for insulation and air sealing. Insulation slows heat transfer, while air sealing reduces uncontrolled drafts and air leakage. Together, these measures improve comfort and help control energy consumption, provided the building envelope and ventilation systems are designed and installed correctly.
Examples: Installing insulation in exterior walls, roofs, and floors where required; sealing gaps around penetrations; fitting appropriate air-barrier materials; and ensuring windows and doors are integrated into the weather-control layers correctly.
Good insulation and air sealing must work alongside appropriate ventilation. Your builder should coordinate these elements to meet applicable energy and building code requirements.
10. Next Step: Interior Finishes
With the major services installed and the building envelope prepared, the project moves closer to the visible details that define your home's character. Interior finishing typically includes drywall, paint, flooring, cabinetry, tile, lighting fixtures, and plumbing fixtures. Decisions made during this stage bring together your design choices and turn the construction site into a livable home.
Examples: Selecting wall colours, installing kitchen cabinets and countertops, choosing flooring and tile, fitting bathroom fixtures, and installing decorative lighting.
Ready to see your vision come together? Explore Step 9 of our home-building guide to learn about interior finishes, material selection, installation, and the decisions that make your custom home uniquely yours.
-
Questions to answer (FAQ)
-
What is a rough-in? Installing pipes, wires, and ducts inside the framed walls before insulation and drywall.
-
When should I decide on lighting and outlet locations? Before rough-in begins, ideally during design.
-
Is it worth pre-wiring for smart home technology? Wiring is cheap during construction and expensive to add later.
-
Which heating system is best? It depends on climate, budget, energy goals, and available fuel and utilities.
-
What is a pre-drywall inspection? A review of the in-wall work before it is covered; some owners also hire an independent inspector.
Forced-Air Systems
Use a furnace or heat pump with ducts to distribute conditioned air throughout the home.
Pros: Can provide both heating and cooling with compatible equipment.
Cons: Requires duct space and proper airflow balancing.
Heat Pumps
Transfer heat rather than generating it directly, providing efficient heating and, with suitable equipment, cooling.
Pros: Can offer efficient year-round comfort.
Cons: Performance and operating costs depend on climate, system design, electricity rates, and backup heating requirements.
Radiant Floor Heating
Uses warm water tubing or electric heating elements beneath the floor surface.
Pros: Comfortable, evenly distributed warmth.
Cons: Can cost more to install and respond more slowly to temperature changes; cooling generally requires a separate system.
Ventilation Systems
Heat recovery ventilators (HRVs) and energy recovery ventilators (ERVs) bring in fresh air while recovering some energy from outgoing air.
Pros: Support indoor air quality while reducing ventilation energy losses.
Cons: Require suitable design, installation, filter maintenance, and balancing.


09
Interior Finishes
Cabinets, flooring, tile, fixtures, and paint are the details that give your home its personality, and they are also where many projects fall behind schedule. Most delays at this stage come from late or changing selections, not from the work itself.
This page explains the finishing sequence, the selection timeline, and how allowances work so you can stay on schedule and on budget. It is also a good place to show off your best photography, because finishes are what people picture when they imagine their future home.
Your Guide to Building a Custom Home
1. Understanding the Finishing Sequence
Interior finishing follows a planned sequence to ensure materials are installed properly and protected from damage. While the exact order varies by project, the process generally moves from insulation and drywall to painting, cabinetry, flooring, fixtures, and final touch-ups.
A typical sequence includes:
-
Insulation and drywall: Walls and ceilings are insulated, sealed, boarded, and finished.
-
Priming and painting: Surfaces are prepared, with initial paint coats applied where appropriate.
-
Cabinetry and trim: Kitchen cabinets, built-ins, interior doors, baseboards, and other millwork are installed.
-
Countertops and tile: Countertops are measured and installed, while tile is laid in bathrooms, kitchens, and other designated areas.
-
Flooring and fixtures: Flooring, plumbing fixtures, lighting, hardware, and appliances are installed according to the project schedule.
-
Final touch-ups: Paint is corrected, finishes are inspected, and remaining details are completed.
Examples: Hardwood flooring may be installed after cabinetry to protect it during construction, while other flooring systems may require a different sequence. Your builder coordinates the order based on the materials and installation requirements.
2. Planning Your Selections Timeline
Many finishing materials need to be selected well before installation. Custom cabinetry, specialty lighting, imported tile, and certain appliances can have extended lead times. Waiting too long to make decisions can delay other trades and push back your completion date.
A selections timeline works backward from each installation date, allowing time for choosing, ordering, delivery, and any necessary adjustments.
Examples:
-
Choose kitchen appliances early so cabinet dimensions and electrical requirements can be confirmed.
-
Finalize tile selections before waterproofing and tile installation begin.
-
Select plumbing fixtures before rough-in work is completed so connections are in the correct locations.
-
Order custom windows, doors, cabinetry, and specialty lighting well ahead of their required dates.
The goal is to make decisions early enough that materials arrive when the site is ready for them.
3. Understanding Allowances and Your Budget
An allowance is a budget amount set aside for a particular item or category when the exact product or final cost has not yet been confirmed. Allowances may apply to flooring, lighting, appliances, plumbing fixtures, tile, or other selections, depending on your construction agreement.
It is important to understand what each allowance covers. The stated amount may cover the product only, while installation, delivery, taxes, or related materials may be budgeted separately.
-
If you spend more: The additional cost is generally added to your project budget, subject to your contract and any applicable change-order process.
-
If you spend less: The unused amount is handled according to your agreement; it may reduce the final cost or be reconciled in another agreed way.
-
If prices change: Confirm how substitutions, price increases, and additional labour will be managed.
Examples: If your flooring allowance is $12,000 and your selected material costs $14,000, the $2,000 difference may increase your budget, plus any applicable additional costs. Confirm the precise calculation with your builder before approving the selection.
4. Planning Your Kitchen and Bathrooms
Kitchens and bathrooms often require some of the most detailed coordination and can account for a significant portion of interior finishing costs. These rooms bring together cabinetry, countertops, plumbing, lighting, appliances, tile, ventilation, and electrical requirements.
Good planning balances appearance with daily use, storage, durability, and ease of maintenance.
Kitchen considerations:
-
Cabinet layout, storage, drawers, and pantry space
-
Countertop material, backsplash, and island design
-
Appliance sizes, clearances, and electrical requirements
-
Task lighting, decorative lighting, and outlet placement
Bathroom considerations:
-
Vanity storage, mirrors, and lighting
-
Shower design, waterproofing, tile, and drainage
-
Plumbing fixtures and water pressure requirements
-
Ventilation, slip resistance, and easy-to-clean surfaces
Examples: A large kitchen island may create a natural gathering space, while a curbless shower can provide a clean, contemporary look when the floor structure and drainage are designed to accommodate it.
5. Comparing Flooring, Tile, and Countertops
The right material depends on your design goals, budget, lifestyle, and maintenance preferences. A material that looks beautiful in a showroom may perform differently in a busy household or a high-moisture area.


6. Choosing Lighting, Plumbing Fixtures, and Hardware
Small details can have a major impact on the finished home. Lighting, faucets, shower fittings, cabinet handles, and door hardware should complement one another while meeting practical requirements.
Consider establishing a consistent design direction, such as contemporary, transitional, or traditional, before making individual selections. Finishes do not have to match exactly, but they should feel intentional throughout the home.
Examples:
-
Use warm metal finishes for a softer, coordinated look.
-
Combine recessed lighting with pendants and task lighting for different needs.
-
Choose faucets and shower fixtures that suit the plumbing configuration and water requirements.
-
Confirm that cabinet pulls, door handles, and hinges are compatible with the selected cabinetry and doors.
Before ordering, check dimensions, finish samples, cleaning requirements, and product availability.
7. Working With a Designer or Selections Coordinator
A designer or selections coordinator can help turn a collection of individual choices into a cohesive interior. They may guide you through material comparisons, colour palettes, product specifications, budget allowances, and ordering deadlines.
Your builder and design team can also coordinate selections with construction requirements, helping ensure that products fit the space and are compatible with the work being completed.
Examples: A selections coordinator may help compare countertop samples against cabinet finishes, confirm that a chosen light fixture suits the ceiling height, or identify an alternative product if the original selection is unavailable.
The exact level of design support depends on the services included in your project agreement.
8. Avoiding Selection Fatigue and Construction Delays
With so many materials and products available, finishing decisions can become overwhelming. An organized process makes it easier to stay focused, compare options, and avoid rushed choices.
A few practical strategies can help:
-
Set decision deadlines: Make selections before the relevant trades need them.
-
Work in batches: Finalize related choices together, such as bathroom tile, vanity, faucets, and lighting.
-
Use physical samples: View colours and materials in your home's lighting wherever possible.
-
Track every selection: Record product names, colours, sizes, prices, suppliers, and approval dates.
-
Confirm lead times: Check availability before approving products.
-
Limit last-minute changes: Changes after ordering or installation may add costs, require rework, or affect the schedule.
Examples: Create a single selections document with approved products and keep samples of your main flooring, cabinetry, countertop, and paint colours together. This makes it easier to check that the overall design remains consistent.
9. Next Step: Inspections, Walkthrough, and Warranty
Once the interior finishes are installed, your home moves toward final inspections, completion checks, and handover. This stage is an opportunity to review the workmanship, identify outstanding items, understand how your home's systems operate, and learn what is covered by the applicable warranty.
The next guide explains what to expect during the final walkthrough, how deficiencies are documented, which documents and operating instructions to collect, and how to prepare for life in your new home.
Continue to Step 10: Inspections, Walkthrough, and Warranty.
-
Questions to answer (FAQ)
-
When do I need to choose my finishes? Many selections are needed well before installation because products have lead times; give your own timeline.
-
What is an allowance? A budgeted amount for an item, such as flooring or lighting, that you choose within.
-
Can I supply my own materials? Sometimes; explain your policy on owner-supplied items and warranty impact.
-
What if my selection is out of stock? Explain how your team handles substitutions and schedule changes.
-
Do I need an interior designer? Not required, but helpful for cohesion and for avoiding costly mistakes.


Flooring
-
Hardwood: Warm, timeless, and refinishing may be possible; can scratch or react to moisture.
-
Engineered wood: Natural wood appearance with a layered construction; performance varies by product.
-
Porcelain tile: Durable and moisture-resistant; can feel cold and may be harder underfoot.
-
Luxury vinyl plank: Often cost-effective and easy to maintain; quality and repairability vary.
Cost depends on material grade, preparation, installation, and finishing details.
Tile
-
Porcelain: Dense, durable, and suitable for many wet areas.
-
Ceramic: Available in many styles and can be economical for appropriate applications.
-
Natural stone: Distinctive and varied, but may need sealing and specialized care.
Tile size, layout, waterproofing, surface preparation, and labour all affect total cost.
Countertops
-
Quartz: Consistent appearance and generally easy maintenance; not immune to heat damage.
-
Granite: Natural variation and good durability; sealing may be recommended.
-
Marble: Elegant natural veining, but more vulnerable to staining and etching.
-
Porcelain slab: Offers a range of designs and strong heat and stain resistance, depending on the product; fabrication requires specialist expertise.
Thickness, edge profiles, cut-outs, seams, and installation influence the final price.
Examples: A family with young children may prioritize durable, easy-care flooring, while a homeowner seeking a distinctive luxury kitchen may choose a natural stone countertop with a carefully planned maintenance routine.
10
Inspections, Walkthrough, and Warranty
The final stage is making sure everything is built to standard and works the way it should. A careful walkthrough and a clear warranty give you confidence on move-in day and peace of mind for years afterward.
This page explains the final inspections, how to run a walkthrough, what a punch list is, and what a new home warranty covers. It is a high-trust page, so be specific about your own process and your warranty terms.
Your Guide to Building a Custom Home
1. Final Inspections and Occupancy
Before you can move into your new home, the required inspections and approvals must be completed. These confirm that the work meets the applicable building requirements and that any outstanding conditions for occupancy have been satisfied.
Depending on the municipality and project, final checks may cover structural work, electrical and plumbing systems, heating and ventilation, fire and life-safety features, and other building requirements.
An occupancy permit or equivalent municipal approval, where required, confirms that the home is authorized for occupancy under the applicable rules. The terminology and process vary by municipality, so always confirm the requirements with your local building department.
Examples:
-
Confirm that required municipal inspections have been passed.
-
Ensure outstanding inspection items have been addressed.
-
Obtain the required occupancy approval before moving in.
-
Collect relevant permits, inspection records, and system documentation.
Your builder can help coordinate the applicable inspections and explain which approvals remain outstanding before handover.
2. The Final Walkthrough: Step by Step
The final walkthrough gives you an opportunity to review your home with your builder before or around handover. Rather than simply looking at the finished spaces, take your time testing fixtures, checking finishes, and confirming that agreed work has been completed.
A systematic, room-by-room approach makes it easier to identify issues that might otherwise be overlooked.
How to conduct your walkthrough:
-
Start outside: Check exterior finishes, decks, stairs, railings, drainage, landscaping, and access areas included in the project.
-
Inspect doors and windows: Open and close each one, check locks, and look for visible damage or gaps.
-
Review walls, ceilings, and floors: Look for scratches, uneven finishes, stains, cracks, or damage.
-
Test cabinetry and hardware: Open drawers and doors, inspect alignment, and check handles and soft-close mechanisms where provided.
-
Run plumbing fixtures: Test faucets, showers, toilets, drains, and visible connections for leaks or unusual operation.
-
Test electrical features: Check accessible switches, lights, outlets where appropriate, and installed controls.
-
Check heating and cooling: Confirm the systems operate and ask how to use the thermostat and ventilation controls.
-
Test appliances: Operate installed appliances according to their instructions and confirm that included items are present.
-
Review the details: Check paint touch-ups, caulking, tile grout, trim, and other finishing work.
-
Record outstanding items: Photograph concerns and add them to a written list with their locations.
Examples: If a bedroom door does not latch properly or a countertop has a visible chip, record the exact location, take a photograph, and discuss the appropriate repair with your builder.
3. Final Walkthrough Checklist
Use this checklist during your walkthrough and mark each item as you inspect it. Add notes and photographs wherever something needs further attention.
Exterior and site
-
Exterior finishes are complete and free of visible damage
-
Roof, gutters, and visible drainage components appear complete
-
Decks, stairs, railings, and exterior doors are secure
-
Walkways, driveway, and landscaping included in the contract are complete
-
Water drains away from the home as intended
Doors and windows
-
Doors open, close, and latch properly
-
Locks and handles work correctly
-
Windows open and close as designed
-
Glass and frames have no visible damage
-
Weatherstripping and visible seals appear intact
Floors, walls, and paint
-
Flooring is free of noticeable damage
-
Walls and ceilings have no obvious unfinished areas
-
Paint coverage and touch-ups are acceptable
-
Tile, grout, and visible caulking are complete
-
Trim and baseboards are secure and finished
Cabinets and countertops
-
Cabinet doors and drawers operate properly
-
Cabinetry is aligned and securely installed
-
Countertops have no visible chips or damage
-
Shelves, handles, and hardware are installed
-
Built-ins and millwork included in the contract are complete
Plumbing
-
Faucets and showers operate properly
-
Toilets flush correctly
-
Drains flow and fixtures show no visible leaks
-
Hot water is available and operating as expected
-
Shut-off valves and relevant access points are identified
Electrical and lighting
-
Installed lights and switches operate
-
Outlets and controls are in their intended locations
-
Dimmer switches and smart controls work as intended
-
Electrical panel and safety devices are identified
-
Smoke and carbon monoxide alarms are installed and functioning as required
Heating, cooling, and ventilation
-
Heating and cooling systems operate as expected
-
Thermostats and controls are demonstrated
-
Ventilation system operates and filters are accessible
-
Bathroom and kitchen exhaust systems operate
-
Equipment manuals and maintenance instructions are provided
Appliances and handover
-
Included appliances are installed and tested
-
Appliance models and accessories match the agreement
-
Keys, remotes, access codes, and garage controls are provided
-
Operating manuals and warranty documents are collected
-
Outstanding work is documented in writing
-
Notes, deficiencies, and items to follow up
This is a practical homeowner checklist, not a substitute for required municipal inspections, specialist testing, or the terms of your construction agreement.
4. What Is a Punch List?
A punch list, also called a deficiency or outstanding-items list, records work that still needs attention after a walkthrough or inspection. Items may include minor repairs, incomplete finishes, adjustments, or agreed work that has not yet been completed.
A useful punch list identifies each issue clearly so everyone understands what needs to happen next.
-
Record the issue: Describe the problem and its exact location.
-
Add evidence: Include photographs where useful.
-
Assign responsibility: Confirm who will arrange the repair or follow-up.
-
Agree on timing: Establish a reasonable target date, considering access, materials, and trade availability.
-
Confirm completion: Review the repair and update the list when the item is resolved.
Examples: A scratched cabinet door, a sticking window, or a missing piece of trim can be recorded as separate items with a photograph, responsible party, and agreed completion date.
Some items may be completed before handover, while others may be scheduled afterward under an agreed process. Your contract and applicable legal requirements determine how completion, payment, and outstanding work are handled.
5. Should You Hire an Independent Home Inspector?
An independent home inspector can provide an additional perspective on the condition and visible workmanship of your new home. This may be particularly helpful if you want an impartial review before taking possession or if you would like help identifying issues that are difficult to spot during a general walkthrough.
Depending on the inspector's qualifications and the agreed scope, an inspection may review visible structural components, roofing, drainage, plumbing, electrical features, heating and cooling, and interior finishes.
Examples of when it may make sense:
-
You want an independent review before handover.
-
You are unfamiliar with residential construction.
-
You would like a more detailed inspection alongside the builder's walkthrough.
-
You want a written report to help prioritize concerns.
Confirm that the inspector has experience with new construction and understands the limitations of inspecting a newly built home. An ordinary home inspection does not replace municipal approvals, specialized testing, or inspections required by your contract or warranty provider.
6. Understanding Your Home Warranty
If your new home is covered by British Columbia's mandatory residential construction warranty, commonly referred to as 2-5-10 home warranty insurance, the coverage generally follows these minimum periods:
2 years
Materials and labour
Generally covers specified defects in materials and labour, including certain distribution systems and building-envelope components, subject to the warranty terms.
5 years
Building envelope
Generally covers specified defects in the building envelope, including water penetration, as defined by the policy.
10 years
Structural defects
Generally covers specified structural defects, subject to the policy's definitions and limitations.
Coverage is not the same as a guarantee that every issue will be repaired at any time. Cosmetic damage, normal wear and tear, maintenance-related problems, and other exclusions may not be covered. Exact coverage, limits, exclusions, and start dates depend on the policy and applicable rules.
Custom homes can have different arrangements depending on how they are built and who is legally responsible for the construction. Before relying on a warranty, confirm that the home is covered, identify the warranty provider, and read the actual policy.
For official guidance, visit the Homeowner Protection Office resources through BC Housing
7. How to Make a Warranty Claim
If an issue appears after you move in, document it promptly and follow the correct reporting process. Contacting your builder may be the right first step for workmanship questions, but a formal warranty claim may also need to be submitted directly to the warranty provider.
A practical process:
-
Document the issue: Take clear photographs or videos and note when you first noticed it.
-
Describe the location: Identify the room, affected component, and circumstances.
-
Contact the appropriate party: Use the contact details in your handover documents or warranty policy.
-
Submit the claim correctly: Follow the provider's reporting instructions and retain copies of your submission.
-
Track the response: Record dates, reference numbers, communications, and any agreed next steps.
-
Act quickly on urgent problems: Active leaks, electrical hazards, or other safety concerns may require immediate attention rather than waiting for a routine warranty response.
Examples: If you discover water entering around a window, photograph the affected area, record when the leak occurs, take reasonable steps to prevent further damage, and report it promptly. Avoid invasive repairs before the cause has been assessed unless immediate action is necessary to protect people or prevent further damage.
Response and repair timelines vary by the issue, the responsible party, the policy, and the urgency. Check your warranty documents for reporting deadlines and escalation procedures rather than assuming every claim will be addressed within a fixed period.
8. Moving In and Maintaining Your New Home
A newly built home still needs regular care. During the first year, materials may dry and settle, seasonal weather changes can affect the building, and you will become familiar with how your home's systems operate.
A simple maintenance routine helps protect finishes, identify concerns early, and keep equipment working efficiently.
First-year and seasonal maintenance tips:
-
Heating and ventilation: Check filters and follow the manufacturer's maintenance schedule. Learn how to operate your ventilation system.
-
Plumbing: Check beneath sinks and around fixtures for leaks. Know where the main water shut-off is located.
-
Exterior drainage: Keep gutters, downspouts, and drainage areas clear, and make sure water is directed away from the foundation.
-
Windows and doors: Check seals, locks, and operation as the seasons change.
-
Caulking and grout: Monitor wet areas and repair deteriorating seals using suitable materials.
-
Smoke and carbon monoxide alarms: Test them as instructed and replace batteries or units when required.
-
Landscaping: Follow watering and drainage guidance, especially around newly planted areas and slopes.
-
Records: Keep manuals, receipts, warranties, approved plans, and maintenance records in one place.
Minor changes such as small drywall cracks or gaps at trim can occur as materials adjust to changing conditions, but not every crack is harmless. Document changes and seek professional advice if you notice significant movement, recurring moisture, or other concerning symptoms. Do not delay reporting a potential warranty issue while waiting to see whether it improves.
9. Ready to Build Your Custom Home?
Building a custom home is a major investment, and a well-organized process can make the experience more predictable. From your first consultation and budget planning through design, construction, finishes, and handover, each stage helps prepare you for the next.
At West Coast Turn Key, the goal is to help homeowners navigate the building process with clear communication, careful coordination, and attention to detail. The specific services and responsibilities are confirmed for each project.
Ready to discuss your vision?
Whether you already own a property or are exploring the possibilities, start with a conversation about your goals, priorities, budget, and timeline.
Start with Step 1: Initial Consultation, or contact West Coast Turn Key to discuss your custom home project.
Questions to answer (FAQ)
-
What should I look for during a final walkthrough? Surface finish quality, working fixtures and appliances, doors and windows, and anything that differs from the plans.
-
What is a punch list? A written list of small items to fix or finish after the main construction is done.
-
How long is a new home warranty? Coverage varies by region and by the type of defect; state your own terms clearly.
-
Should I hire my own inspector? It is optional but common; explain how you work with one.
-
What if I find a problem after moving in? Explain your warranty process and response time.


Phone: 604.351.8142
Email: office@westcoastturnkey.com
#101 - 6697 Nelson Ave, West Vancouver
BC V7W-2B2
© 2026 West Coast Turn Key. All Rights Reserved. Website Designed & Developed by Page Quest
05
Permits and Approvals
Before any work begins, your plans need approval from your local authority, and that approval is one of the biggest sources of schedule delays. A complete, well-prepared application moves faster than one that comes back with questions.
This page breaks down the permit process, what documents are usually required, how long it can take, and how an experienced builder keeps the project moving. Rules differ by municipality, so always point readers to your local building department and keep the details specific to your area.
Your Guide to Building a Custom Home
1. What Is a Building Permit and Why Do You Need One?
A building permit is an official authorization from the local authority to carry out specified construction work. It helps ensure that your proposed home meets applicable building code requirements and that the project complies with relevant zoning and other regulations. Obtaining the required permits before construction protects your investment and helps prevent costly corrections, enforcement issues, or delays later on.
Examples: Building a new home, constructing an addition, or making structural changes may require a building permit. The exact requirements depend on your municipality and the scope of work.
2. Which Permits Does a New Home Usually Need?
Building a new home can involve several permits and approvals, depending on the property's location, design, and servicing requirements. Some applications may be handled separately from the main building permit, while others may be coordinated through the municipality or relevant utility providers. Identifying these requirements early helps your team plan the project properly.
Examples: Building, plumbing, and electrical permits; mechanical or heating system approvals where required; driveway or access permits; and, where applicable, tree removal, demolition, environmental, or development permits.
3. What Do You Need to Apply?
A complete permit application gives the municipality the information it needs to review your proposed home. Preparing accurate drawings, site information, and supporting documents early can help reduce requests for additional information and keep the approval process moving. The required documents vary depending on the municipality, property, and complexity of the project.
Examples: Architectural and construction drawings, a site plan, property survey, structural engineering documents, energy-compliance information, drainage plans, and completed application forms. Additional geotechnical or other reports may be required for certain properties.
4. The Permit Process, Step by Step
The permitting process typically begins once your design and supporting documents are ready for submission. The municipality reviews the application for compliance with applicable regulations and may request clarifications or revisions before issuing approval. Staying organized, responding promptly to review comments, and coordinating your consultants can help keep the process on track.
Examples:
-
Submit the application and supporting documents.
-
The municipality checks the application for completeness.
-
Building officials review the plans and identify any outstanding requirements.
-
Your design team addresses comments and submits revisions.
-
Outstanding fees, conditions, and supporting approvals are completed.
-
The permit is issued, allowing the authorized work to begin.
The exact sequence varies by municipality, and some approvals may need to be obtained before a building permit can be issued.
5. How Long Does It Take?
Permit timelines depend on the municipality, project complexity, application completeness, and whether additional approvals are required. A straightforward application may move more quickly than a complex custom home involving steep terrain, environmental restrictions, or significant design revisions. It's important to allow time for permitting when planning your construction schedule rather than assuming work can begin immediately after submitting the application.
Examples: The City of North Vancouver publishes an average processing time of approximately 11–12 months for new construction, while noting that timelines vary by project complexity. This is a municipal benchmark, not a guaranteed timeline for West Vancouver or every North Shore project. Incomplete applications, consultant revisions, and outstanding development approvals can add time.
Our advice: Begin discussions with the relevant municipality early and build a realistic approval period into your project schedule.
6. Permit Fees and Development Charges
Permit expenses extend beyond the basic building permit fee. Depending on the project, you may need to budget for trade permits, development cost charges, engineering reviews, inspections, deposits, and other municipal fees. These amounts depend on the property's location, construction value, project scope, and applicable bylaws, so they should be confirmed before finalizing your budget.
Examples: In West Vancouver, the building permit fee for construction valued above $750,000 is calculated using a base fee plus an additional amount for each $1,000 of construction value above that threshold. Separate electrical and plumbing permit fees may also apply. Development cost charges can be additional.
You can review the official District of West Vancouver permit fees and regulations for current fee schedules.
Budget tip: Ask for a breakdown of anticipated municipal fees, consultant costs, utility charges, and refundable deposits so you understand which costs are included in your construction budget.
7. Inspections During Construction
Receiving a building permit is only the beginning. During construction, required inspections help verify that work complies with approved plans, applicable building codes, and relevant safety requirements. Inspections must be coordinated at the appropriate stages, often before work is covered up, so any issues can be identified and addressed promptly.
Examples: Depending on the project and local requirements, inspections may include excavation and foundations, drainage, framing, plumbing, electrical work, insulation and air-barrier details, and final completion. Your builder should coordinate the construction schedule around required inspections and ensure outstanding items are resolved before proceeding.
8. Who Handles the Permits: You or Your Builder?
Permit responsibilities should be clearly established before the project begins. Depending on the municipality and project arrangement, the homeowner, builder, architect, or another authorized professional may prepare, submit, or coordinate different applications. At West Coast Turn Key, we help homeowners understand the approvals required for their project and coordinate with the appropriate design professionals, consultants, and authorities as agreed upon for the build.
Examples: Helping identify required permits, coordinating construction drawings and engineering documents, tracking outstanding approvals, communicating with consultants, and planning construction around permit issuance and inspections.
Our goal is to make the process easier to navigate, keep everyone informed, and help ensure the necessary approvals are in place before the relevant work begins. Specific application and sign-off responsibilities will be confirmed for each project.
9. Next Step: Site Preparation & Foundation
Once the necessary permits have been issued and pre-construction requirements have been satisfied, your project can move toward site preparation and foundation work. This stage transforms your approved plans into a physical building site. Proper planning, excavation, drainage, and foundation construction are essential to creating a safe, stable starting point for your new home.
Examples: Arranging site access, establishing erosion and sediment controls where required, preparing the property, completing excavation, installing required drainage and underground services, constructing formwork, placing reinforcing steel, and pouring the foundation in accordance with the approved plans.
Ready to break ground? Explore Step 6 of our home-building guide to learn what happens during site preparation, excavation, and foundation construction—and what homeowners should expect before the structure begins to take shape.
Questions to answer (FAQ)
-
Do I need a permit to build a house? In almost every case, yes. Confirm with your local building department.
-
How long does it take to get a building permit? Give your local range and say that complete applications are reviewed faster.
-
Who applies for the permit? Often the builder or designer, with the owner's authorization.
-
What happens if I build without a permit? It can lead to stop-work orders, fines, and trouble selling or insuring the home.
-
Can the permit be refused? Yes, if the plans do not meet code or zoning, but most issues are fixed with revisions.
03
Design
Design is where your ideas become a floor plan that fits your lifestyle, your lot, and your budget. It is also the stage where changes are cheapest, so every hour spent here saves money and stress during construction.
This page explains how the design process moves from first sketches to final construction drawings, who is involved, and how to make decisions you will still love years from now. Show real floor plans, renderings, and before-and-after photos from your own work to make this page stand out.
Your Guide to Building a Custom Home
1. The Design Process, Step by Step
Designing a custom home is a collaborative process that turns your ideas into a detailed, buildable plan. It begins with understanding your needs, lifestyle, and budget, then progresses through concept sketches, floor plans, exterior design, and detailed construction drawings. Taking the time to review each stage helps ensure your home reflects your vision before construction begins.
Examples: Creating a wish list, reviewing initial sketches, adjusting room layouts, exploring exterior materials, viewing 3D renderings, and approving final drawings for permitting and construction.
2. Who Is on the Design Team?
A successful custom home project often involves several professionals working together to bring your vision to life. Each person contributes specialized knowledge, from the overall appearance and functionality of your home to its structural integrity and interior finishes. Understanding their roles helps you know who to contact for different decisions and how your team will coordinate throughout the project.
Examples: An architect or home designer develops the plans, a structural engineer designs key structural elements, an interior designer helps select finishes and fixtures, and your builder coordinates construction planning, practical considerations, and project execution. The exact team depends on your home's complexity and local requirements.
3. Custom, Semi-Custom, or Spec: Which Is Right for You?
Not every homeowner needs the same level of design freedom. Understanding the differences between custom, semi-custom, and spec homes helps you choose an approach that suits your budget, timeline, and priorities. The right option depends on how much personalization you want and how involved you'd like to be in the design process.
Examples:
-
Custom home: Designed around your specific property, lifestyle, and preferences, offering the greatest flexibility.
-
Semi-custom home: Starts with an existing plan or design, allowing selected changes to layouts, finishes, and features.
-
Spec home: Built by a developer or builder based on their chosen design and specifications, often with fewer opportunities for customization.
4. Designing for Your Lot
Your property plays a major role in how your home should be designed. Factors such as sunlight, views, slope, privacy, access, and local zoning requirements can influence the home's layout, orientation, and overall construction costs. Designing with the lot in mind helps maximize its potential while addressing practical limitations before they become expensive challenges.
Examples: Positioning living areas to capture natural light, placing windows to take advantage of mountain or ocean views, designing around a sloped site, creating privacy from neighbouring homes, and checking setbacks and height restrictions before finalizing plans.
5. Floor Plan Planning Checklist
A well-designed floor plan should support how you live today while accommodating your needs in the future. Beyond the appearance of individual rooms, consider how people move through the home, where everyday items will be stored, and how indoor and outdoor spaces connect. Careful planning can improve comfort, functionality, and long-term value.
Examples: Ensuring smooth flow between the kitchen and dining area, including sufficient storage, maximizing natural light, planning an efficient kitchen layout, creating a private primary suite, adding a home office, and considering wider doorways or a main-floor bedroom for aging in place.
6. Energy Efficiency and Building Performance
Energy efficiency should be considered early in the design process rather than treated as an afterthought. Decisions about insulation, windows, air sealing, ventilation, and heating and cooling systems affect your home's comfort, energy consumption, and long-term operating costs. Working with qualified professionals helps ensure these elements work together and meet applicable building code requirements.
Examples: Selecting energy-efficient windows, improving insulation, reducing unwanted air leakage, planning balanced ventilation, and choosing an appropriately sized heat pump or other suitable heating and cooling system.
7. How Many Design Revisions Should You Expect?
Design revisions are a normal part of creating a custom home. They allow you to refine layouts, reconsider materials, and resolve issues before construction begins. However, frequent changes late in the process can delay approvals, require additional design work, and increase costs. Establishing clear review stages and decision deadlines helps keep your project moving forward.
Examples: Reviewing floor plans before exterior elevations, consolidating feedback from everyone involved, confirming room dimensions early, and finalizing major selections before construction drawings are completed. Ask your design team how revisions are handled and whether additional changes incur fees.
8. Next Step: Land and Site Selection
Before moving into construction, it's important to ensure the property is suitable for the home you want to build. Evaluating zoning, site conditions, access, servicing, and potential development restrictions helps you understand what is possible and what additional costs may arise. Ideally, land selection and design should inform one another so your vision fits the property.
Examples: Reviewing zoning regulations, checking utility availability, investigating soil and drainage conditions, assessing slope and excavation requirements, and confirming that your intended home can fit within applicable setbacks and height limits.
Already own your land? Your process may look a little different. Site assessment and preliminary design can happen together, and your existing property's conditions will help guide the design from the beginning.
Ready for the next step? Explore Step 4 of our home-building guide to learn how to evaluate land, understand site conditions, and prepare your property for construction.
Questions to answer (FAQ)
-
How long does it take to design a custom home? Give a typical range and explain what speeds it up.
-
How much does home design cost? Explain common pricing models: percentage of construction cost, flat fee, or included in a design-build contract.
-
Can I use a stock plan and change it? Yes, but explain the cost and code review needed for changes.
-
What are construction drawings? Explain they are the detailed plans used for permits and building.
-
When should I choose finishes? Early, because choices affect structure, electrical, and plumbing layout.
01
Communication and Initial Consultation
Every great home starts with a clear conversation about your goals, your budget, and how you want to live. The first meetings with your builder set the tone for the whole project, and the quality of that communication often predicts how smoothly the build will go.
This page explains what to expect from an initial consultation, what to bring, and which questions reveal whether a builder is the right fit. It also covers how communication should work during construction, including who your main contact is, how often you will get updates, and how changes are approved.
Your Guide to Building a Custom Home
1. What Happens in the First Consultation?
The first consultation is an opportunity to get to know your builder, discuss your vision, and determine whether you’re a good fit to work together. It’s where your ideas begin to take shape and the initial direction of your project is established. You’ll discuss your goals, property, timeline, and approximate budget, as well as the next steps involved in bringing your dream home to life.
Examples: Discussing the number of bedrooms you need, your preferred architectural style, whether you already own a property, and your ideal move-in date.
2. What to Prepare Before You Meet
Coming prepared helps make your first meeting more productive and ensures your builder understands what matters most to you. You don’t need every detail figured out, but having a general idea of your priorities, budget, and preferred style can help guide the conversation and establish realistic expectations from the beginning.
Examples: Creating a wish list, separating must-haves from nice-to-haves, collecting inspiration photos from Pinterest, bringing property or lot details, and identifying a comfortable budget range.
3. Questions to Ask a Home Builder
Choosing the right builder is one of the most important decisions you’ll make during your project. Asking the right questions helps you understand their experience, working style, and approach to managing your investment. A reputable builder should be transparent, willing to answer your questions, and able to explain how they manage the construction process from start to finish.
Examples: Asking to see previous projects, requesting client references, confirming licensing and insurance, understanding warranty coverage, and learning how unexpected costs, design changes, or construction delays are handled.
4. Red Flags to Watch For
Building a home is a significant financial commitment, so it’s important to recognize potential warning signs before signing an agreement. Clear communication, transparent pricing, and written documentation help protect both you and your builder. If something feels unclear or you’re being pressured into making a quick decision, take the time to ask questions and seek clarification.
Examples: Vague estimates with no cost breakdown, reluctance to provide references, pressure to sign immediately, unclear payment schedules, or an unwillingness to provide a detailed written contract.
5. How Communication Works During the Build
Good communication keeps your project organized and helps you stay informed as your home takes shape. Before construction begins, establish how often you’ll receive updates, who your main point of contact will be, and how important decisions will be documented. Having a clear communication plan reduces misunderstandings and helps address questions before they become larger issues.
Examples: Weekly progress updates, scheduled site visits, regular meetings with your project manager, shared schedules and project documents, and written confirmation of changes to the design or budget.
6. Fixed-Price vs. Cost-Plus Contracts
Understanding your construction contract helps you make informed financial decisions before work begins. A fixed-price contract generally sets an agreed price for a defined scope of work, while a cost-plus contract charges the actual project costs along with an agreed builder’s fee. Each approach has advantages, and the right choice depends on the project, the level of design detail, and how costs and changes are managed.
Examples: A fixed-price agreement may offer greater cost predictability when plans and specifications are well defined. A cost-plus agreement may provide flexibility when selections or project details are still evolving. In either case, clarify exclusions, allowances, change orders, fees, and how cost overruns are handled.
7. Next Step: Understanding Your Budget
Once you have a clear vision and understand the building process, the next step is establishing a realistic budget. Your budget should account for more than the construction itself, including design fees, permits, site preparation, utility connections, landscaping, and a contingency for unexpected expenses. Planning these costs early helps you prioritize your spending and make confident decisions throughout the project.
Examples: Establishing your overall spending limit, estimating construction costs, identifying potential site expenses, setting aside a contingency fund, and deciding where to invest in premium materials or finishes.
Ready to take the next step? Explore Step 2 of our home-building guide to learn how to plan your budget and understand the costs involved in building your custom home.
Questions to answer (FAQ)
-
How do I find a good home builder? Ask for referrals, review past projects, read reviews, and interview at least three builders.
-
What should I bring to my first builder meeting? A wish list, inspiration photos, a budget range, and any lot or survey information.
-
Should I get multiple quotes? Yes, but compare scope and inclusions, not just the final number.
-
How do I know if a builder is licensed and insured? Ask for proof and verify it with your local licensing authority.
-
What happens if I change my mind during the build? Changes are handled through a written change order that shows the cost and schedule impact.
04
Land and Site Selection
The right lot shapes everything from your floor plan to your final cost, and the wrong lot can bring costly surprises. A beautiful piece of land is only a good buy if you can actually build the home you want on it.
This page explains what to check before you buy, which professionals to involve, and how site conditions such as slope, soil, water, and access change your budget. If you already own land, the same checklist helps you confirm what is possible and what it will cost.
Your Guide to Building a Custom Home
1. Start With Your Goals
Choosing the right property is the foundation of a successful custom home project. Before purchasing land, think about how you want to live, what matters most to your family, and how the property will support your long-term plans. The right location should balance your lifestyle, budget, and vision for your future home.
Examples: Deciding whether you want mountain or ocean views, a larger yard, more privacy, convenient access to work, nearby schools, or enough space for a workshop, garden, or future secondary suite.
2. Zoning, Setbacks, and What You Are Allowed to Build
Not every property can accommodate every type of home. Local zoning regulations determine what you can build and may restrict building height, lot coverage, setbacks from property lines, and the use of secondary suites or detached structures. Understanding these restrictions before purchasing land helps you avoid investing in a property that cannot accommodate your plans.
Examples: Checking the maximum permitted building height, determining how close your home can sit to property boundaries, confirming whether a secondary suite is allowed, and checking whether a detached garage or garden suite can be built. Always verify requirements with the local municipality.
3. Utilities and Access
A property may look ideal, but access to essential services can significantly affect the cost and complexity of construction. Before committing to a purchase, confirm how the property will connect to water, sewer or septic systems, electricity, gas, and internet. You should also consider whether construction vehicles and emergency services can safely access the site.
Examples: Confirming municipal water and sewer connections, investigating the cost of extending electrical service, checking internet availability, determining whether a driveway entrance needs approval, and identifying whether a private road requires maintenance agreements.
4. Soil, Slope, and Drainage
The physical condition of your property can have a major impact on your home's design, foundation, and construction budget. Sloped land, unstable soil, groundwater, or poor drainage may require additional engineering and site preparation. Surveys and geotechnical assessments help identify potential challenges early, allowing your design and construction team to plan accordingly.
Examples: Conducting a geotechnical investigation to assess soil stability, obtaining a survey to confirm property boundaries and elevations, evaluating drainage patterns, and identifying whether retaining walls, specialized foundations, excavation, or additional drainage systems may be necessary.
5. Environmental and Hazard Checks
Environmental conditions and local development restrictions can affect where and how you build. Depending on the property, you may need to investigate flood risks, steep slopes, protected trees, environmentally sensitive areas, or restrictions near streams and other bodies of water. Identifying these considerations early helps you understand potential limitations, additional costs, and approval requirements.
Examples: Checking floodplain maps, confirming streamside protection requirements, determining whether protected trees can be removed, investigating wildfire exposure, and reviewing applicable environmental assessments or development permit requirements.
6. Easements, Covenants, and Title
Before purchasing land, it's important to understand the legal restrictions and rights associated with the property. Easements may allow others to access or maintain utilities on your land, while covenants can limit how the property is developed or used. Reviewing the title and relevant legal documents helps identify restrictions that could affect your proposed home.
Examples: Discovering a utility easement where a garage was planned, identifying a shared driveway agreement, checking a covenant that limits building height or exterior design, or confirming legal access to the property. A qualified real estate lawyer or notary can help review title documents and explain their implications.
7. Due Diligence Checklist Before You Buy
Purchasing land is a major investment, and completing the right checks before committing can help prevent costly surprises. Use this checklist as a starting point when evaluating a property. The specific investigations required will depend on the location, terrain, intended design, and local regulations.
Land Purchase Checklist
Check off each item as you complete your review.
-
Confirm zoning and permitted uses
-
Verify setbacks, height limits, and lot coverage
-
Review title, easements, and covenants
-
Confirm legal road and driveway access
-
Check water, sewer or septic, power, gas, and internet
-
Obtain a property survey and confirm boundaries
-
Investigate soil conditions, slope, and drainage
-
Review flood, environmental, and other hazard risks
-
Estimate site preparation, excavation, and retaining wall costs
-
Confirm permit requirements with the municipality
-
Review development costs and your overall budget
-
Have relevant professionals review outstanding concerns before removing purchase conditions
Important: Where appropriate, make your purchase conditional on satisfactory due diligence and professional review. Consult your real estate professional and lawyer or notary about suitable contract conditions and deadlines.
8. Next Step: Permits and Approvals
Once you've selected a suitable property and confirmed what can be built, the next stage is understanding the permits and approvals required for your project. Depending on the location and complexity of your home, this may involve development permits, building permits, engineering documents, and other municipal or provincial requirements. Planning ahead helps reduce delays and ensures your project meets applicable regulations before construction begins.
Examples: Preparing construction drawings, submitting building permit applications, obtaining engineering approvals, addressing municipal review comments, and confirming any tree removal, demolition, or development permit requirements.
Ready for the next step? Explore Step 5 of our home-building guide to learn about permits, municipal approvals, and what needs to happen before construction can begin.
Questions to answer (FAQ)
-
Can I build on any piece of land? No. Zoning, utilities, access, and site conditions all decide whether a lot is buildable.
-
How do I know if a lot is buildable? Check with the local planning department, review zoning, and hire a surveyor and, where needed, a geotechnical engineer.
-
How much does it cost to prepare a lot? It varies widely with clearing, grading, utilities, and drainage; get site-specific quotes.
-
Should I talk to a builder before buying land? Yes. A builder can flag costs and design limits before you commit.
-
What is a survey and why do I need one? A survey shows boundaries, easements, elevations, and what can fit on the lot.
05
Permits and Approvals
Before any work begins, your plans need approval from your local authority, and that approval is one of the biggest sources of schedule delays. A complete, well-prepared application moves faster than one that comes back with questions.
This page breaks down the permit process, what documents are usually required, how long it can take, and how an experienced builder keeps the project moving. Rules differ by municipality, so always point readers to your local building department and keep the details specific to your area.
Your Guide to Building a Custom Home
1. What Is a Building Permit and Why Do You Need One?
A building permit is an official authorization from the local authority to carry out specified construction work. It helps ensure that your proposed home meets applicable building code requirements and that the project complies with relevant zoning and other regulations. Obtaining the required permits before construction protects your investment and helps prevent costly corrections, enforcement issues, or delays later on.
Examples: Building a new home, constructing an addition, or making structural changes may require a building permit. The exact requirements depend on your municipality and the scope of work.
2. Which Permits Does a New Home Usually Need?
Building a new home can involve several permits and approvals, depending on the property's location, design, and servicing requirements. Some applications may be handled separately from the main building permit, while others may be coordinated through the municipality or relevant utility providers. Identifying these requirements early helps your team plan the project properly.
Examples: Building, plumbing, and electrical permits; mechanical or heating system approvals where required; driveway or access permits; and, where applicable, tree removal, demolition, environmental, or development permits.
3. What Do You Need to Apply?
A complete permit application gives the municipality the information it needs to review your proposed home. Preparing accurate drawings, site information, and supporting documents early can help reduce requests for additional information and keep the approval process moving. The required documents vary depending on the municipality, property, and complexity of the project.
Examples: Architectural and construction drawings, a site plan, property survey, structural engineering documents, energy-compliance information, drainage plans, and completed application forms. Additional geotechnical or other reports may be required for certain properties.
4. The Permit Process, Step by Step
The permitting process typically begins once your design and supporting documents are ready for submission. The municipality reviews the application for compliance with applicable regulations and may request clarifications or revisions before issuing approval. Staying organized, responding promptly to review comments, and coordinating your consultants can help keep the process on track.
Examples:
-
Submit the application and supporting documents.
-
The municipality checks the application for completeness.
-
Building officials review the plans and identify any outstanding requirements.
-
Your design team addresses comments and submits revisions.
-
Outstanding fees, conditions, and supporting approvals are completed.
-
The permit is issued, allowing the authorized work to begin.
The exact sequence varies by municipality, and some approvals may need to be obtained before a building permit can be issued.
5. How Long Does It Take?
Permit timelines depend on the municipality, project complexity, application completeness, and whether additional approvals are required. A straightforward application may move more quickly than a complex custom home involving steep terrain, environmental restrictions, or significant design revisions. It's important to allow time for permitting when planning your construction schedule rather than assuming work can begin immediately after submitting the application.
Examples: The City of North Vancouver publishes an average processing time of approximately 11–12 months for new construction, while noting that timelines vary by project complexity. This is a municipal benchmark, not a guaranteed timeline for West Vancouver or every North Shore project. Incomplete applications, consultant revisions, and outstanding development approvals can add time.
Our advice: Begin discussions with the relevant municipality early and build a realistic approval period into your project schedule.
6. Permit Fees and Development Charges
Permit expenses extend beyond the basic building permit fee. Depending on the project, you may need to budget for trade permits, development cost charges, engineering reviews, inspections, deposits, and other municipal fees. These amounts depend on the property's location, construction value, project scope, and applicable bylaws, so they should be confirmed before finalizing your budget.
Examples: In West Vancouver, the building permit fee for construction valued above $750,000 is calculated using a base fee plus an additional amount for each $1,000 of construction value above that threshold. Separate electrical and plumbing permit fees may also apply. Development cost charges can be additional.
You can review the official District of West Vancouver permit fees and regulations for current fee schedules.
Budget tip: Ask for a breakdown of anticipated municipal fees, consultant costs, utility charges, and refundable deposits so you understand which costs are included in your construction budget.
7. Inspections During Construction
Receiving a building permit is only the beginning. During construction, required inspections help verify that work complies with approved plans, applicable building codes, and relevant safety requirements. Inspections must be coordinated at the appropriate stages, often before work is covered up, so any issues can be identified and addressed promptly.
Examples: Depending on the project and local requirements, inspections may include excavation and foundations, drainage, framing, plumbing, electrical work, insulation and air-barrier details, and final completion. Your builder should coordinate the construction schedule around required inspections and ensure outstanding items are resolved before proceeding.
8. Who Handles the Permits: You or Your Builder?
Permit responsibilities should be clearly established before the project begins. Depending on the municipality and project arrangement, the homeowner, builder, architect, or another authorized professional may prepare, submit, or coordinate different applications. At West Coast Turn Key, we help homeowners understand the approvals required for their project and coordinate with the appropriate design professionals, consultants, and authorities as agreed upon for the build.
Examples: Helping identify required permits, coordinating construction drawings and engineering documents, tracking outstanding approvals, communicating with consultants, and planning construction around permit issuance and inspections.
Our goal is to make the process easier to navigate, keep everyone informed, and help ensure the necessary approvals are in place before the relevant work begins. Specific application and sign-off responsibilities will be confirmed for each project.
9. Next Step: Site Preparation & Foundation
Once the necessary permits have been issued and pre-construction requirements have been satisfied, your project can move toward site preparation and foundation work. This stage transforms your approved plans into a physical building site. Proper planning, excavation, drainage, and foundation construction are essential to creating a safe, stable starting point for your new home.
Examples: Arranging site access, establishing erosion and sediment controls where required, preparing the property, completing excavation, installing required drainage and underground services, constructing formwork, placing reinforcing steel, and pouring the foundation in accordance with the approved plans.
Ready to break ground? Explore Step 6 of our home-building guide to learn what happens during site preparation, excavation, and foundation construction—and what homeowners should expect before the structure begins to take shape.
Questions to answer (FAQ)
-
Do I need a permit to build a house? In almost every case, yes. Confirm with your local building department.
-
How long does it take to get a building permit? Give your local range and say that complete applications are reviewed faster.
-
Who applies for the permit? Often the builder or designer, with the owner's authorization.
-
What happens if I build without a permit? It can lead to stop-work orders, fines, and trouble selling or insuring the home.
-
Can the permit be refused? Yes, if the plans do not meet code or zoning, but most issues are fixed with revisions.
06
Site Preparation and Foundation
This is the stage where your plans first take physical shape on the ground. Everything above the foundation depends on it, so getting site preparation and foundation work right matters for the entire life of your home.
This page explains what happens from the first day of site work through the finished foundation, including clearing, excavation, footings, walls, waterproofing, and inspections. Use photos from real projects at each stage, because homeowners love seeing what the process looks like.
Your Guide to Building a Custom Home
1. Site Preparation: Clearing, Grading & Temporary Access
Site preparation transforms your property into a safe, organized construction site. Before excavation begins, the team establishes access, clears approved areas, identifies the building location, and puts necessary safety and environmental measures in place. Proper preparation helps protect the surrounding property and ensures construction can proceed efficiently.
Examples: Removing approved trees and vegetation, installing temporary fencing, setting up erosion and sediment controls, arranging temporary power, establishing construction vehicle access, and surveying and staking the location of your new home.
2. Excavation
Excavation involves removing soil and other material to create space for the foundation, basement, and underground services. The depth and extent of excavation depend on your home's design, the property's slope, and the ground conditions. Unexpected rock, groundwater, or unsuitable soil can affect both the construction schedule and budget, making proper site investigation especially important.
Examples: Digging for foundation footings, excavating a basement, removing excess soil, managing groundwater, and arranging additional engineering or soil stabilization if unexpected conditions are discovered.
3. Footings & Foundation Walls
The foundation transfers the weight of your home into the ground below. Footings distribute that load, while foundation walls support the structure and, where applicable, retain the surrounding soil. Reinforcement, concrete placement, and proper curing must follow the approved structural design and specifications to help ensure the foundation performs as intended.
Examples: Setting up formwork, installing reinforcing steel, arranging required inspections, pouring concrete footings and walls, and allowing the concrete to cure sufficiently before proceeding with subsequent work.
4. Foundation Types Compared
The right foundation depends on the property, soil conditions, climate, design, budget, and how you intend to use the space. Your builder and design professionals can help determine which option best suits your project.
5. Waterproofing & Drainage
Keeping water away from the foundation is critical to protecting your home. Appropriate waterproofing or damp-proofing, foundation drainage, and surface grading help manage moisture and reduce the risk of water entering below-ground spaces. The right solution depends on soil conditions, groundwater levels, foundation design, and local requirements.
Examples: Applying the specified foundation membrane, installing perimeter drain tile, protecting waterproofing before backfill, directing downspouts away from the foundation, and ensuring the finished ground slopes appropriately to manage surface water.
6. Underground Services
Before the foundation area is fully covered or construction advances, essential services must be installed and coordinated with the home's design. These connections allow your home to receive water, electricity, and other utilities while safely managing wastewater and drainage. Planning their locations early helps avoid conflicts with foundations, driveways, landscaping, and other site features.
Examples: Installing water and sewer connections, preparing an approved septic system where required, coordinating electrical conduits and gas services, and installing necessary underground drainage and service lines.
The exact timing depends on the utility provider, municipal requirements, inspections, and the construction sequence.
7. Inspections at This Stage
Inspections help verify that important foundation and underground work meets approved plans and applicable requirements before it becomes concealed. Some work must be inspected before concrete is poured or trenches are covered, so scheduling inspections at the right time is essential. Your builder should coordinate the work with the relevant inspectors and address any outstanding items before proceeding.
Examples: Footing and reinforcing inspections, foundation or structural checks where required, underground plumbing inspections, drainage verification, and confirmation of applicable waterproofing or site requirements before backfilling.
The exact inspection stages vary by municipality and project.
8. How Long Does This Stage Take?
Site preparation and foundation work can take several weeks, but the schedule depends on the home's size, foundation type, site access, weather, and ground conditions. A straightforward site may progress relatively quickly, while steep terrain, rock excavation, groundwater, retaining walls, or complex servicing can extend the timeline.
Your builder should provide a project-specific schedule and update it if unexpected conditions arise.
Examples of common delays:
-
Heavy rain or unsuitable ground conditions.
-
Unexpected rock, groundwater, or unstable soil.
-
Additional excavation or retaining wall requirements.
-
Delays in concrete deliveries or utility connections.
-
Inspection availability or work that needs correction.
Planning for contingencies at this stage helps reduce disruption to the rest of the build.
9. Next Step: Framing
Once the foundation has been completed, the necessary inspections are passed, and the site is ready for the next phase, framing begins. This is when your home starts to become recognizable, as the walls, floors, roof structure, and major openings take shape. Accurate framing establishes the layout and structure that will support the rest of the construction process.
Examples: Installing floor systems, erecting exterior and interior wall frames, constructing the roof structure, creating window and door openings, and coordinating structural beams and supports according to the approved plans.
Ready to see your home take shape? Explore Step 7 of our home-building guide to learn how framing works, what happens during this stage, and how your home's structure comes together.
Questions to answer (FAQ)
-
What type of foundation is best for my house? It depends on soil, climate, slope, budget, and whether you want a basement.
-
How long does a foundation take? Give a typical range from excavation to ready-for-framing, noting curing and inspections.
-
Can you build a foundation in winter or rain? Sometimes, with precautions; explain how your team handles it.
-
Why do we need a geotechnical report? It tells engineers how the soil will carry the building.
-
What is backfilling? Refilling soil around the foundation after inspection and waterproofing.
Slab on Grade
A concrete slab is constructed on a prepared base, with the required insulation, reinforcement, and services incorporated into the design.
Advantages
Often simpler and faster to construct, with no conventional basement excavation.
Considerations
Limited below-floor storage and careful planning needed for plumbing and other services.
Often suitable for sites where ground conditions and design make a slab practical.
Crawl Space
An elevated floor sits above a shallow foundation, leaving an accessible space beneath part or all of the home.
Advantages
Can provide access to certain plumbing and services without a full basement.
Considerations
Requires appropriate moisture control, insulation, ventilation or conditioning as designed, and ongoing maintenance access.
May suit particular site elevations and house designs.
Full Basement
A below-ground level creates additional enclosed space beneath the main floor.
Advantages
Provides opportunities for storage, mechanical rooms, recreation areas, or additional living space where permitted.
Considerations
Typically involves more excavation, concrete, waterproofing, drainage, and potentially greater groundwater management costs.
May be attractive where the terrain, budget, and design support below-ground space.
07
Framing and Structure
Framing is the moment your home's layout becomes real, and it is often the most exciting milestone to watch. Walls, floors, and the roof go up, and you can finally walk through the rooms you have only seen on paper.
This page explains what framing includes, how long it typically takes, the materials and methods used, and what to look for on site visits. It is also the best time to confirm details like window locations, ceiling heights, and outlet placement, because changes get harder and more expensive afterward.
Your Guide to Building a Custom Home
1. What Is Framing?
Framing is the structural framework that forms the skeleton of your home. It supports the floors, walls, and roof while creating the spaces for bedrooms, bathrooms, kitchens, windows, and doors. Accurate framing is essential because it influences the home's strength, layout, and the installation of everything that follows.
Examples: Building exterior and interior walls, installing floor joists and structural beams, constructing roof trusses, and adding structural sheathing to walls and roof sections.
2. The Framing Sequence
Framing typically follows a planned sequence, starting with the floor system and progressing upward through the walls and roof. Each component must be properly aligned, secured, and coordinated with the structural drawings and other building requirements. Once the main framework and sheathing are complete, the team can begin preparing the home for weather protection and subsequent trades.
Examples of the typical sequence:
-
Install the floor system over the foundation.
-
Frame the exterior and interior walls.
-
Install the second-floor structure for multi-storey homes.
-
Construct the roof using engineered trusses or rafters.
-
Apply structural sheathing where specified.
-
Install the required weather-resistive barrier and coordinate exterior openings.
The exact order may vary depending on the home's design and construction method.
3. Materials & Building Methods Compared
The framing system affects structural performance, energy efficiency, construction time, design flexibility, and cost. The best option depends on the project's requirements, local conditions, the design team, and the experience of the construction crew.
4. Windows, Doors & Getting the House “Dried In”
Once the main structure is complete, the next priority is protecting the home from the weather. This process, often called getting the house “dried in,” involves installing the appropriate roofing, weather barriers, windows, exterior doors, and other components that help keep rain and moisture out. Reaching this milestone allows interior work to progress with better protection from the elements.
Examples: Installing roof coverings, fitting exterior windows and doors, applying weather-resistive barriers, sealing openings, and completing exterior detailing to manage water intrusion.
Important: “Dried in” does not necessarily mean the home is fully waterproof or airtight. Proper flashing, drainage details, and inspections remain essential.
5. Structural Inspections
Before framing is concealed by insulation and interior finishes, required inspections help verify that the structure meets approved plans and applicable building requirements. These checks are important for identifying issues while the relevant components are still accessible. Your builder should coordinate inspections and resolve any deficiencies before the work proceeds to the next stage.
Examples: Checking structural beams and posts, load-bearing walls, roof framing, connections and bracing, fastening patterns, and compliance with approved engineering drawings. Additional checks may apply depending on the construction method and local requirements.
6. The Framing Walkthrough
The framing walkthrough is your opportunity to walk through the home's layout with your builder while changes may still be easier to make. Even with approved drawings, standing inside the actual spaces can reveal details you want to reconsider before plumbing, electrical work, insulation, and drywall begin. Review your plans carefully and discuss any concerns before authorizing changes.
Use this walkthrough checklist:
-
Confirm bedroom, bathroom, and living-space layouts.
-
Check ceiling heights and the feel of each room.
-
Review window locations, sizes, and expected views.
-
Confirm door swings, entryways, and hallway widths.
-
Check stair locations, clearances, and access between floors.
-
Review kitchen island placement and appliance locations.
-
Confirm storage areas, closets, and mechanical room access.
-
Identify locations for televisions, built-ins, and other planned features.
-
Raise any concerns about privacy, natural light, or furniture placement.
-
Record requested changes and confirm their cost and schedule implications with your builder.
Our advice: Bring your approved floor plans and a list of questions. Any changes should be reviewed by the appropriate design or engineering professional and approved where necessary before work proceeds.
7. How Long Does Framing Take?
Framing can take several weeks or longer, depending on the size and complexity of the home, the construction method, weather conditions, crew availability, and material deliveries. A straightforward home may progress faster than a multi-storey custom build with complex rooflines, large structural openings, or extensive architectural detailing.
Examples of potential delays:
-
Complicated structural designs requiring additional coordination.
-
Rain or other weather conditions affecting safe work and material protection.
-
Delays in lumber, engineered beams, windows, or roof trusses.
-
Changes to the approved layout after framing has begun.
-
Inspection scheduling or corrections to work that does not meet requirements.
Your builder should keep you informed of progress and explain how any delays affect the wider construction schedule.
8. Next Step: Mechanical, Electrical & Plumbing
With the home's structural framework in place, the next stage involves installing the systems that make it comfortable, functional, and ready for everyday living. Mechanical, electrical, and plumbing work is commonly coordinated while walls and ceilings remain open, allowing the trades to install and inspect their systems before insulation and drywall conceal them.
Examples: Installing plumbing supply and drain lines, electrical wiring and outlets, heating and cooling equipment, ventilation ductwork, and bathroom exhaust systems.
Ready for the next stage? Explore Step 8 of our home-building guide to understand how mechanical, electrical, and plumbing systems are installed, what decisions homeowners need to make, and how to prepare for the next phase of construction.
-
Questions to answer (FAQ)
-
How long does it take to frame a house? Give a realistic range and explain how size and weather change it.
-
Can I make changes during framing? Small changes are possible, but they cost more now than during design.
-
What is a dried-in house? The roof, windows, and exterior doors are installed so interior work can continue regardless of weather.
-
What is a framing inspection? A check that the structure meets plans and code before it is covered.
-
Is wood framing the best choice? It is the most common, but other methods may suit certain climates, budgets, and goals.
Wood Frame
A widely used residential construction method using timber studs, joists, beams, and sheathing.
Advantages: Widely available materials, familiar construction methods, and flexible design options.
Considerations: Requires proper moisture management, structural detailing, and protection during construction.
Steel Frame
Uses steel structural members or light-gauge steel studs, depending on the design.
Advantages: Consistent dimensions, resistance to rot and wood-damaging insects, and suitability for certain structural applications.
Considerations: Thermal bridging, corrosion protection, and specialized detailing need careful attention.
Structural Insulated Panels (SIPs)
Factory-made panels combine structural facings with an insulating core.
Advantages: Can provide efficient installation and a well-insulated building envelope when correctly detailed.
Considerations: Requires careful design coordination, panel-joint detailing, and planning for services and future modifications.
Insulated Concrete Forms (ICF)
Insulating forms hold reinforced concrete to create walls, commonly used for foundations and sometimes above-grade walls.
Advantages: Strong concrete walls with integrated insulation and useful thermal performance.
Considerations: Requires specialized installation, concrete placement planning, and coordination of openings and services.
Your builder and design professionals can help compare these options based on your home's design, energy goals, budget, and local building requirements.
08
Mechanical, Electrical, and Plumbing (MEP)
Behind your walls is the system that keeps your home comfortable, powered, and running smoothly. This stage is called the rough-in, and it is the last chance to add wiring, pipes, and ducts without opening finished walls.
This page explains what happens during rough-in, how plumbers, electricians, and heating and cooling contractors coordinate, and which upgrades are worth planning now rather than later. Walking through the home with your builder before drywall is one of the most valuable steps in the entire process.
Your Guide to Building a Custom Home
1. What Does MEP Mean?
MEP stands for Mechanical, Electrical, and Plumbing. These three systems work together to provide heating, cooling, ventilation, lighting, power, and running water throughout your home. Although much of this work is hidden once construction is complete, it has a major impact on comfort, safety, efficiency, and long-term maintenance.
Examples:
-
Mechanical: Heating, air conditioning, ventilation, and indoor air quality.
-
Electrical: Wiring, outlets, switches, lighting, electrical panels, and power distribution.
-
Plumbing: Water supply, drains, waste pipes, fixtures, and hot water systems.
2. The Rough-In Sequence
Rough-in is the stage when the main pipes, wiring, ductwork, and other services are installed before walls and ceilings are closed up. The trades need to coordinate their work carefully to avoid conflicts and ensure that everything fits within the planned spaces. Completing this stage correctly makes later inspections and finishing work much easier.
Examples: Installing water supply and drain pipes, routing heating and ventilation ductwork, running electrical wiring, and adding low-voltage cables for internet, security, and audio systems. The exact sequence varies depending on the design and coordination between trades.
3. Heating and Cooling Options
Your heating and cooling system affects indoor comfort, energy use, and operating costs. The best solution depends on your home's size, insulation, layout, budget, and energy goals. Discussing options early allows the mechanical designer or qualified contractor to size the system properly and coordinate it with the home's ventilation requirements.
4. Electrical Planning
Electrical planning is about more than deciding where the lights go. Your home's electrical layout should support your daily routines, furniture arrangements, appliances, and future technology. Reviewing these details before wiring begins helps reduce the need for extensions, relocations, or expensive changes after the walls are finished.
Examples: Planning sufficient outlets in bedrooms and living areas, placing switches at convenient entrances, adding task lighting in the kitchen, providing dedicated circuits for major appliances, and discussing electrical panel capacity with your electrician.
Consider where you might want exterior lighting, landscape lighting, workshop equipment, or additional appliances in the future. All electrical work should comply with applicable codes and be completed by appropriately qualified professionals.
5. Smart Home and Low-Voltage Wiring
Smart home and low-voltage systems can make your home easier to manage, more secure, and better connected. Installing suitable cabling and conduits while the walls are open is often simpler than adding them after construction. Even if you don't plan to install every system immediately, preparing for future upgrades can give you greater flexibility.
Examples: Ethernet connections for home offices and televisions, wireless access point locations, security cameras, alarm systems, doorbell cameras, whole-home audio, and wiring for automated blinds or smart lighting.
Discuss your priorities with your builder and technology installer so cable routes, equipment locations, and power requirements are coordinated before drywall installation.
6. EV Charger and Solar Readiness
Planning for electric vehicle charging and potential solar panels during construction can reduce the cost and disruption of future upgrades. Installing suitable conduit, reserving space for equipment, and assessing electrical panel capacity early can be easier than modifying completed walls, driveways, or electrical systems later. However, the required capacity depends on your home's electrical design and anticipated future loads.
Examples: Installing conduit from the electrical panel to the garage, planning a dedicated EV charging circuit, reserving suitable space for future electrical equipment, and coordinating roof design and wiring routes for a potential solar installation.
Ask your electrician to assess panel capacity, service size, load management options, and any applicable utility requirements rather than assuming a larger panel or circuit will automatically be needed.
7. Plumbing Planning
Plumbing decisions affect convenience, water efficiency, maintenance access, and construction costs. Confirming fixture locations and hot water requirements before rough-in helps prevent conflicts with cabinetry, structural components, and other systems. It's also worth considering how easily key plumbing components can be accessed if maintenance is needed in the future.
Examples: Finalizing kitchen sink and dishwasher locations, choosing shower and bathtub configurations, planning bathroom fixtures, selecting a suitable water heater, and locating accessible shutoff valves. Discuss whether a conventional tank, tankless system, or heat pump water heater best suits your household and home design.
8. Inspections and the Pre-Drywall Walkthrough
Before insulation and drywall cover the rough-in work, required inspections must be completed and the systems should be reviewed for coordination and accessibility. This is one of the last opportunities to identify missing outlets, misplaced pipes, awkward equipment access, or other concerns while everything remains visible.
Pre-drywall checklist:
-
Confirm outlet, switch, and lighting locations.
-
Review kitchen, bathroom, and laundry plumbing locations.
-
Verify heating and cooling vents and equipment placement.
-
Confirm network cables, security wiring, and smart home provisions.
-
Check provisions for EV charging and future technology.
-
Ensure shutoff valves, cleanouts, and service access are practical.
-
Confirm required plumbing, electrical, and other inspections are complete.
-
Ask your builder to document concealed services and any approved changes.
-
Confirm outstanding deficiencies are addressed before walls are closed.
Our advice: Walk through the home with your builder and, where appropriate, the relevant trades. Photographing visible pipe and cable routes before they are covered can also help with future maintenance.
9. Insulation and Air Sealing
Once rough-in work and required inspections are complete, the home can be prepared for insulation and air sealing. Insulation slows heat transfer, while air sealing reduces uncontrolled drafts and air leakage. Together, these measures improve comfort and help control energy consumption, provided the building envelope and ventilation systems are designed and installed correctly.
Examples: Installing insulation in exterior walls, roofs, and floors where required; sealing gaps around penetrations; fitting appropriate air-barrier materials; and ensuring windows and doors are integrated into the weather-control layers correctly.
Good insulation and air sealing must work alongside appropriate ventilation. Your builder should coordinate these elements to meet applicable energy and building code requirements.
10. Next Step: Interior Finishes
With the major services installed and the building envelope prepared, the project moves closer to the visible details that define your home's character. Interior finishing typically includes drywall, paint, flooring, cabinetry, tile, lighting fixtures, and plumbing fixtures. Decisions made during this stage bring together your design choices and turn the construction site into a livable home.
Examples: Selecting wall colours, installing kitchen cabinets and countertops, choosing flooring and tile, fitting bathroom fixtures, and installing decorative lighting.
Ready to see your vision come together? Explore Step 9 of our home-building guide to learn about interior finishes, material selection, installation, and the decisions that make your custom home uniquely yours.
-
Questions to answer (FAQ)
-
What is a rough-in? Installing pipes, wires, and ducts inside the framed walls before insulation and drywall.
-
When should I decide on lighting and outlet locations? Before rough-in begins, ideally during design.
-
Is it worth pre-wiring for smart home technology? Wiring is cheap during construction and expensive to add later.
-
Which heating system is best? It depends on climate, budget, energy goals, and available fuel and utilities.
-
What is a pre-drywall inspection? A review of the in-wall work before it is covered; some owners also hire an independent inspector.
Forced-Air Systems
Use a furnace or heat pump with ducts to distribute conditioned air throughout the home.
Pros: Can provide both heating and cooling with compatible equipment.
Cons: Requires duct space and proper airflow balancing.
Heat Pumps
Transfer heat rather than generating it directly, providing efficient heating and, with suitable equipment, cooling.
Pros: Can offer efficient year-round comfort.
Cons: Performance and operating costs depend on climate, system design, electricity rates, and backup heating requirements.
Radiant Floor Heating
Uses warm water tubing or electric heating elements beneath the floor surface.
Pros: Comfortable, evenly distributed warmth.
Cons: Can cost more to install and respond more slowly to temperature changes; cooling generally requires a separate system.
Ventilation Systems
Heat recovery ventilators (HRVs) and energy recovery ventilators (ERVs) bring in fresh air while recovering some energy from outgoing air.
Pros: Support indoor air quality while reducing ventilation energy losses.
Cons: Require suitable design, installation, filter maintenance, and balancing.
09
Interior Finishes
Cabinets, flooring, tile, fixtures, and paint are the details that give your home its personality, and they are also where many projects fall behind schedule. Most delays at this stage come from late or changing selections, not from the work itself.
This page explains the finishing sequence, the selection timeline, and how allowances work so you can stay on schedule and on budget. It is also a good place to show off your best photography, because finishes are what people picture when they imagine their future home.
Your Guide to Building a Custom Home
1. Understanding the Finishing Sequence
Interior finishing follows a planned sequence to ensure materials are installed properly and protected from damage. While the exact order varies by project, the process generally moves from insulation and drywall to painting, cabinetry, flooring, fixtures, and final touch-ups.
A typical sequence includes:
-
Insulation and drywall: Walls and ceilings are insulated, sealed, boarded, and finished.
-
Priming and painting: Surfaces are prepared, with initial paint coats applied where appropriate.
-
Cabinetry and trim: Kitchen cabinets, built-ins, interior doors, baseboards, and other millwork are installed.
-
Countertops and tile: Countertops are measured and installed, while tile is laid in bathrooms, kitchens, and other designated areas.
-
Flooring and fixtures: Flooring, plumbing fixtures, lighting, hardware, and appliances are installed according to the project schedule.
-
Final touch-ups: Paint is corrected, finishes are inspected, and remaining details are completed.
Examples: Hardwood flooring may be installed after cabinetry to protect it during construction, while other flooring systems may require a different sequence. Your builder coordinates the order based on the materials and installation requirements.
2. Planning Your Selections Timeline
Many finishing materials need to be selected well before installation. Custom cabinetry, specialty lighting, imported tile, and certain appliances can have extended lead times. Waiting too long to make decisions can delay other trades and push back your completion date.
A selections timeline works backward from each installation date, allowing time for choosing, ordering, delivery, and any necessary adjustments.
Examples:
-
Choose kitchen appliances early so cabinet dimensions and electrical requirements can be confirmed.
-
Finalize tile selections before waterproofing and tile installation begin.
-
Select plumbing fixtures before rough-in work is completed so connections are in the correct locations.
-
Order custom windows, doors, cabinetry, and specialty lighting well ahead of their required dates.
The goal is to make decisions early enough that materials arrive when the site is ready for them.
3. Understanding Allowances and Your Budget
An allowance is a budget amount set aside for a particular item or category when the exact product or final cost has not yet been confirmed. Allowances may apply to flooring, lighting, appliances, plumbing fixtures, tile, or other selections, depending on your construction agreement.
It is important to understand what each allowance covers. The stated amount may cover the product only, while installation, delivery, taxes, or related materials may be budgeted separately.
-
If you spend more: The additional cost is generally added to your project budget, subject to your contract and any applicable change-order process.
-
If you spend less: The unused amount is handled according to your agreement; it may reduce the final cost or be reconciled in another agreed way.
-
If prices change: Confirm how substitutions, price increases, and additional labour will be managed.
Examples: If your flooring allowance is $12,000 and your selected material costs $14,000, the $2,000 difference may increase your budget, plus any applicable additional costs. Confirm the precise calculation with your builder before approving the selection.
4. Planning Your Kitchen and Bathrooms
Kitchens and bathrooms often require some of the most detailed coordination and can account for a significant portion of interior finishing costs. These rooms bring together cabinetry, countertops, plumbing, lighting, appliances, tile, ventilation, and electrical requirements.
Good planning balances appearance with daily use, storage, durability, and ease of maintenance.
Kitchen considerations:
-
Cabinet layout, storage, drawers, and pantry space
-
Countertop material, backsplash, and island design
-
Appliance sizes, clearances, and electrical requirements
-
Task lighting, decorative lighting, and outlet placement
Bathroom considerations:
-
Vanity storage, mirrors, and lighting
-
Shower design, waterproofing, tile, and drainage
-
Plumbing fixtures and water pressure requirements
-
Ventilation, slip resistance, and easy-to-clean surfaces
Examples: A large kitchen island may create a natural gathering space, while a curbless shower can provide a clean, contemporary look when the floor structure and drainage are designed to accommodate it.
5. Comparing Flooring, Tile, and Countertops
The right material depends on your design goals, budget, lifestyle, and maintenance preferences. A material that looks beautiful in a showroom may perform differently in a busy household or a high-moisture area.
6. Choosing Lighting, Plumbing Fixtures, and Hardware
Small details can have a major impact on the finished home. Lighting, faucets, shower fittings, cabinet handles, and door hardware should complement one another while meeting practical requirements.
Consider establishing a consistent design direction, such as contemporary, transitional, or traditional, before making individual selections. Finishes do not have to match exactly, but they should feel intentional throughout the home.
Examples:
-
Use warm metal finishes for a softer, coordinated look.
-
Combine recessed lighting with pendants and task lighting for different needs.
-
Choose faucets and shower fixtures that suit the plumbing configuration and water requirements.
-
Confirm that cabinet pulls, door handles, and hinges are compatible with the selected cabinetry and doors.
Before ordering, check dimensions, finish samples, cleaning requirements, and product availability.
7. Working With a Designer or Selections Coordinator
A designer or selections coordinator can help turn a collection of individual choices into a cohesive interior. They may guide you through material comparisons, colour palettes, product specifications, budget allowances, and ordering deadlines.
Your builder and design team can also coordinate selections with construction requirements, helping ensure that products fit the space and are compatible with the work being completed.
Examples: A selections coordinator may help compare countertop samples against cabinet finishes, confirm that a chosen light fixture suits the ceiling height, or identify an alternative product if the original selection is unavailable.
The exact level of design support depends on the services included in your project agreement.
8. Avoiding Selection Fatigue and Construction Delays
With so many materials and products available, finishing decisions can become overwhelming. An organized process makes it easier to stay focused, compare options, and avoid rushed choices.
A few practical strategies can help:
-
Set decision deadlines: Make selections before the relevant trades need them.
-
Work in batches: Finalize related choices together, such as bathroom tile, vanity, faucets, and lighting.
-
Use physical samples: View colours and materials in your home's lighting wherever possible.
-
Track every selection: Record product names, colours, sizes, prices, suppliers, and approval dates.
-
Confirm lead times: Check availability before approving products.
-
Limit last-minute changes: Changes after ordering or installation may add costs, require rework, or affect the schedule.
Examples: Create a single selections document with approved products and keep samples of your main flooring, cabinetry, countertop, and paint colours together. This makes it easier to check that the overall design remains consistent.
9. Next Step: Inspections, Walkthrough, and Warranty
Once the interior finishes are installed, your home moves toward final inspections, completion checks, and handover. This stage is an opportunity to review the workmanship, identify outstanding items, understand how your home's systems operate, and learn what is covered by the applicable warranty.
The next guide explains what to expect during the final walkthrough, how deficiencies are documented, which documents and operating instructions to collect, and how to prepare for life in your new home.
Continue to Step 10: Inspections, Walkthrough, and Warranty.
-
Questions to answer (FAQ)
-
When do I need to choose my finishes? Many selections are needed well before installation because products have lead times; give your own timeline.
-
What is an allowance? A budgeted amount for an item, such as flooring or lighting, that you choose within.
-
Can I supply my own materials? Sometimes; explain your policy on owner-supplied items and warranty impact.
-
What if my selection is out of stock? Explain how your team handles substitutions and schedule changes.
-
Do I need an interior designer? Not required, but helpful for cohesion and for avoiding costly mistakes.
Flooring
-
Hardwood: Warm, timeless, and refinishing may be possible; can scratch or react to moisture.
-
Engineered wood: Natural wood appearance with a layered construction; performance varies by product.
-
Porcelain tile: Durable and moisture-resistant; can feel cold and may be harder underfoot.
-
Luxury vinyl plank: Often cost-effective and easy to maintain; quality and repairability vary.
Cost depends on material grade, preparation, installation, and finishing details.
Tile
-
Porcelain: Dense, durable, and suitable for many wet areas.
-
Ceramic: Available in many styles and can be economical for appropriate applications.
-
Natural stone: Distinctive and varied, but may need sealing and specialized care.
Tile size, layout, waterproofing, surface preparation, and labour all affect total cost.
Countertops
-
Quartz: Consistent appearance and generally easy maintenance; not immune to heat damage.
-
Granite: Natural variation and good durability; sealing may be recommended.
-
Marble: Elegant natural veining, but more vulnerable to staining and etching.
-
Porcelain slab: Offers a range of designs and strong heat and stain resistance, depending on the product; fabrication requires specialist expertise.
Thickness, edge profiles, cut-outs, seams, and installation influence the final price.
Examples: A family with young children may prioritize durable, easy-care flooring, while a homeowner seeking a distinctive luxury kitchen may choose a natural stone countertop with a carefully planned maintenance routine.
10
Inspections, Walkthrough, and Warranty
The final stage is making sure everything is built to standard and works the way it should. A careful walkthrough and a clear warranty give you confidence on move-in day and peace of mind for years afterward.
This page explains the final inspections, how to run a walkthrough, what a punch list is, and what a new home warranty covers. It is a high-trust page, so be specific about your own process and your warranty terms.
Your Guide to Building a Custom Home
1. Final Inspections and Occupancy
Before you can move into your new home, the required inspections and approvals must be completed. These confirm that the work meets the applicable building requirements and that any outstanding conditions for occupancy have been satisfied.
Depending on the municipality and project, final checks may cover structural work, electrical and plumbing systems, heating and ventilation, fire and life-safety features, and other building requirements.
An occupancy permit or equivalent municipal approval, where required, confirms that the home is authorized for occupancy under the applicable rules. The terminology and process vary by municipality, so always confirm the requirements with your local building department.
Examples:
-
Confirm that required municipal inspections have been passed.
-
Ensure outstanding inspection items have been addressed.
-
Obtain the required occupancy approval before moving in.
-
Collect relevant permits, inspection records, and system documentation.
Your builder can help coordinate the applicable inspections and explain which approvals remain outstanding before handover.
2. The Final Walkthrough: Step by Step
The final walkthrough gives you an opportunity to review your home with your builder before or around handover. Rather than simply looking at the finished spaces, take your time testing fixtures, checking finishes, and confirming that agreed work has been completed.
A systematic, room-by-room approach makes it easier to identify issues that might otherwise be overlooked.
How to conduct your walkthrough:
-
Start outside: Check exterior finishes, decks, stairs, railings, drainage, landscaping, and access areas included in the project.
-
Inspect doors and windows: Open and close each one, check locks, and look for visible damage or gaps.
-
Review walls, ceilings, and floors: Look for scratches, uneven finishes, stains, cracks, or damage.
-
Test cabinetry and hardware: Open drawers and doors, inspect alignment, and check handles and soft-close mechanisms where provided.
-
Run plumbing fixtures: Test faucets, showers, toilets, drains, and visible connections for leaks or unusual operation.
-
Test electrical features: Check accessible switches, lights, outlets where appropriate, and installed controls.
-
Check heating and cooling: Confirm the systems operate and ask how to use the thermostat and ventilation controls.
-
Test appliances: Operate installed appliances according to their instructions and confirm that included items are present.
-
Review the details: Check paint touch-ups, caulking, tile grout, trim, and other finishing work.
-
Record outstanding items: Photograph concerns and add them to a written list with their locations.
Examples: If a bedroom door does not latch properly or a countertop has a visible chip, record the exact location, take a photograph, and discuss the appropriate repair with your builder.
3. Final Walkthrough Checklist
Use this checklist during your walkthrough and mark each item as you inspect it. Add notes and photographs wherever something needs further attention.
Exterior and site
-
Exterior finishes are complete and free of visible damage
-
Roof, gutters, and visible drainage components appear complete
-
Decks, stairs, railings, and exterior doors are secure
-
Walkways, driveway, and landscaping included in the contract are complete
-
Water drains away from the home as intended
Doors and windows
-
Doors open, close, and latch properly
-
Locks and handles work correctly
-
Windows open and close as designed
-
Glass and frames have no visible damage
-
Weatherstripping and visible seals appear intact
Floors, walls, and paint
-
Flooring is free of noticeable damage
-
Walls and ceilings have no obvious unfinished areas
-
Paint coverage and touch-ups are acceptable
-
Tile, grout, and visible caulking are complete
-
Trim and baseboards are secure and finished
Cabinets and countertops
-
Cabinet doors and drawers operate properly
-
Cabinetry is aligned and securely installed
-
Countertops have no visible chips or damage
-
Shelves, handles, and hardware are installed
-
Built-ins and millwork included in the contract are complete
Plumbing
-
Faucets and showers operate properly
-
Toilets flush correctly
-
Drains flow and fixtures show no visible leaks
-
Hot water is available and operating as expected
-
Shut-off valves and relevant access points are identified
Electrical and lighting
-
Installed lights and switches operate
-
Outlets and controls are in their intended locations
-
Dimmer switches and smart controls work as intended
-
Electrical panel and safety devices are identified
-
Smoke and carbon monoxide alarms are installed and functioning as required
Heating, cooling, and ventilation
-
Heating and cooling systems operate as expected
-
Thermostats and controls are demonstrated
-
Ventilation system operates and filters are accessible
-
Bathroom and kitchen exhaust systems operate
-
Equipment manuals and maintenance instructions are provided
Appliances and handover
-
Included appliances are installed and tested
-
Appliance models and accessories match the agreement
-
Keys, remotes, access codes, and garage controls are provided
-
Operating manuals and warranty documents are collected
-
Outstanding work is documented in writing
-
Notes, deficiencies, and items to follow up
This is a practical homeowner checklist, not a substitute for required municipal inspections, specialist testing, or the terms of your construction agreement.
4. What Is a Punch List?
A punch list, also called a deficiency or outstanding-items list, records work that still needs attention after a walkthrough or inspection. Items may include minor repairs, incomplete finishes, adjustments, or agreed work that has not yet been completed.
A useful punch list identifies each issue clearly so everyone understands what needs to happen next.
-
Record the issue: Describe the problem and its exact location.
-
Add evidence: Include photographs where useful.
-
Assign responsibility: Confirm who will arrange the repair or follow-up.
-
Agree on timing: Establish a reasonable target date, considering access, materials, and trade availability.
-
Confirm completion: Review the repair and update the list when the item is resolved.
Examples: A scratched cabinet door, a sticking window, or a missing piece of trim can be recorded as separate items with a photograph, responsible party, and agreed completion date.
Some items may be completed before handover, while others may be scheduled afterward under an agreed process. Your contract and applicable legal requirements determine how completion, payment, and outstanding work are handled.
5. Should You Hire an Independent Home Inspector?
An independent home inspector can provide an additional perspective on the condition and visible workmanship of your new home. This may be particularly helpful if you want an impartial review before taking possession or if you would like help identifying issues that are difficult to spot during a general walkthrough.
Depending on the inspector's qualifications and the agreed scope, an inspection may review visible structural components, roofing, drainage, plumbing, electrical features, heating and cooling, and interior finishes.
Examples of when it may make sense:
-
You want an independent review before handover.
-
You are unfamiliar with residential construction.
-
You would like a more detailed inspection alongside the builder's walkthrough.
-
You want a written report to help prioritize concerns.
Confirm that the inspector has experience with new construction and understands the limitations of inspecting a newly built home. An ordinary home inspection does not replace municipal approvals, specialized testing, or inspections required by your contract or warranty provider.
6. Understanding Your Home Warranty
If your new home is covered by British Columbia's mandatory residential construction warranty, commonly referred to as 2-5-10 home warranty insurance, the coverage generally follows these minimum periods:
2 years
Materials and labour
Generally covers specified defects in materials and labour, including certain distribution systems and building-envelope components, subject to the warranty terms.
5 years
Building envelope
Generally covers specified defects in the building envelope, including water penetration, as defined by the policy.
10 years
Structural defects
Generally covers specified structural defects, subject to the policy's definitions and limitations.
Coverage is not the same as a guarantee that every issue will be repaired at any time. Cosmetic damage, normal wear and tear, maintenance-related problems, and other exclusions may not be covered. Exact coverage, limits, exclusions, and start dates depend on the policy and applicable rules.
Custom homes can have different arrangements depending on how they are built and who is legally responsible for the construction. Before relying on a warranty, confirm that the home is covered, identify the warranty provider, and read the actual policy.
For official guidance, visit the Homeowner Protection Office resources through BC Housing
7. How to Make a Warranty Claim
If an issue appears after you move in, document it promptly and follow the correct reporting process. Contacting your builder may be the right first step for workmanship questions, but a formal warranty claim may also need to be submitted directly to the warranty provider.
A practical process:
-
Document the issue: Take clear photographs or videos and note when you first noticed it.
-
Describe the location: Identify the room, affected component, and circumstances.
-
Contact the appropriate party: Use the contact details in your handover documents or warranty policy.
-
Submit the claim correctly: Follow the provider's reporting instructions and retain copies of your submission.
-
Track the response: Record dates, reference numbers, communications, and any agreed next steps.
-
Act quickly on urgent problems: Active leaks, electrical hazards, or other safety concerns may require immediate attention rather than waiting for a routine warranty response.
Examples: If you discover water entering around a window, photograph the affected area, record when the leak occurs, take reasonable steps to prevent further damage, and report it promptly. Avoid invasive repairs before the cause has been assessed unless immediate action is necessary to protect people or prevent further damage.
Response and repair timelines vary by the issue, the responsible party, the policy, and the urgency. Check your warranty documents for reporting deadlines and escalation procedures rather than assuming every claim will be addressed within a fixed period.
8. Moving In and Maintaining Your New Home
A newly built home still needs regular care. During the first year, materials may dry and settle, seasonal weather changes can affect the building, and you will become familiar with how your home's systems operate.
A simple maintenance routine helps protect finishes, identify concerns early, and keep equipment working efficiently.
First-year and seasonal maintenance tips:
-
Heating and ventilation: Check filters and follow the manufacturer's maintenance schedule. Learn how to operate your ventilation system.
-
Plumbing: Check beneath sinks and around fixtures for leaks. Know where the main water shut-off is located.
-
Exterior drainage: Keep gutters, downspouts, and drainage areas clear, and make sure water is directed away from the foundation.
-
Windows and doors: Check seals, locks, and operation as the seasons change.
-
Caulking and grout: Monitor wet areas and repair deteriorating seals using suitable materials.
-
Smoke and carbon monoxide alarms: Test them as instructed and replace batteries or units when required.
-
Landscaping: Follow watering and drainage guidance, especially around newly planted areas and slopes.
-
Records: Keep manuals, receipts, warranties, approved plans, and maintenance records in one place.
Minor changes such as small drywall cracks or gaps at trim can occur as materials adjust to changing conditions, but not every crack is harmless. Document changes and seek professional advice if you notice significant movement, recurring moisture, or other concerning symptoms. Do not delay reporting a potential warranty issue while waiting to see whether it improves.
9. Ready to Build Your Custom Home?
Building a custom home is a major investment, and a well-organized process can make the experience more predictable. From your first consultation and budget planning through design, construction, finishes, and handover, each stage helps prepare you for the next.
At West Coast Turn Key, the goal is to help homeowners navigate the building process with clear communication, careful coordination, and attention to detail. The specific services and responsibilities are confirmed for each project.
Ready to discuss your vision?
Whether you already own a property or are exploring the possibilities, start with a conversation about your goals, priorities, budget, and timeline.
Start with Step 1: Initial Consultation, or contact West Coast Turn Key to discuss your custom home project.
Questions to answer (FAQ)
-
What should I look for during a final walkthrough? Surface finish quality, working fixtures and appliances, doors and windows, and anything that differs from the plans.
-
What is a punch list? A written list of small items to fix or finish after the main construction is done.
-
How long is a new home warranty? Coverage varies by region and by the type of defect; state your own terms clearly.
-
Should I hire my own inspector? It is optional but common; explain how you work with one.
-
What if I find a problem after moving in? Explain your warranty process and response time.
Phone: 604.351.8142
Email: office@westcoastturnkey.com
#101 - 6697 Nelson Ave, West Vancouver
BC V7W-2B2